Crochet Turkey: Worsted Weight Pattern With 10 Steps
Make a plump crochet turkey with a three-color tail fan and a flat weighted base so he stands on his own. What makes the feathers stand up? Read on.
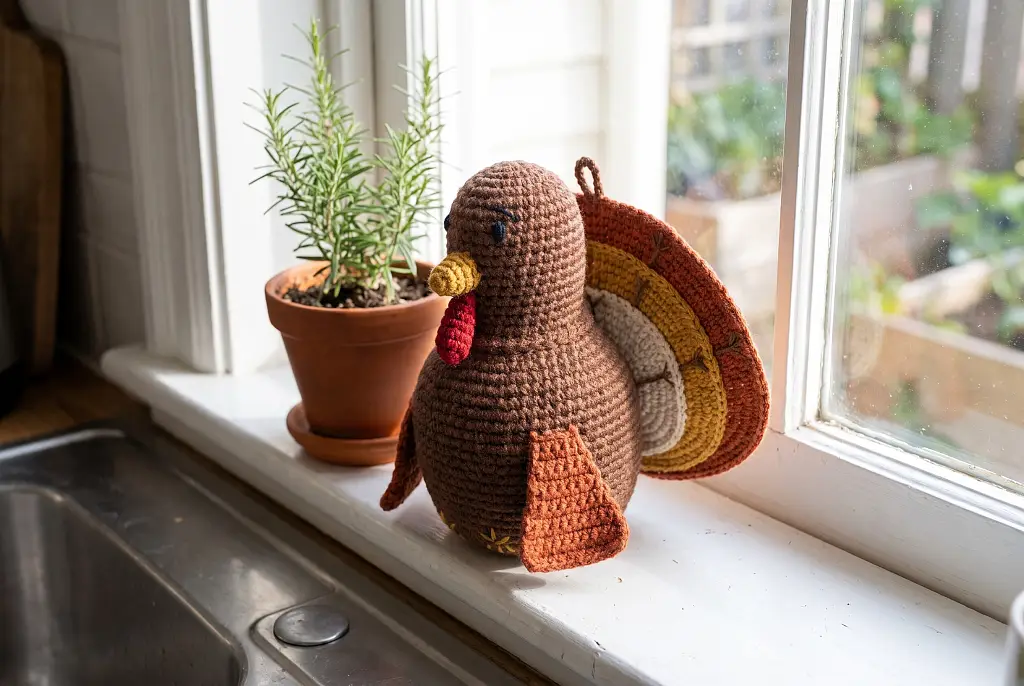
A crochet turkey is a small, stuffed autumn centerpiece you can finish in an afternoon or two, and HookRow's "Harvest Tom Turkey" is one you can make with basic stitches. Its free pattern is further down the page.
The pattern takes worsted weight (#4) yarn in five colors and a 3.5 mm (US E-4) hook. Skill level is Easy. By HookRow's estimates, the finished body stands about 3.2 in tall and 3.3 in across, the project uses about 82 to 122 yd of yarn, and it takes about 5 to 8.5 hours.
Below we cover what makes this crochet turkey different, what to gather, and how to keep it standing and crisp.
What Makes the Harvest Tom Crochet Turkey Different
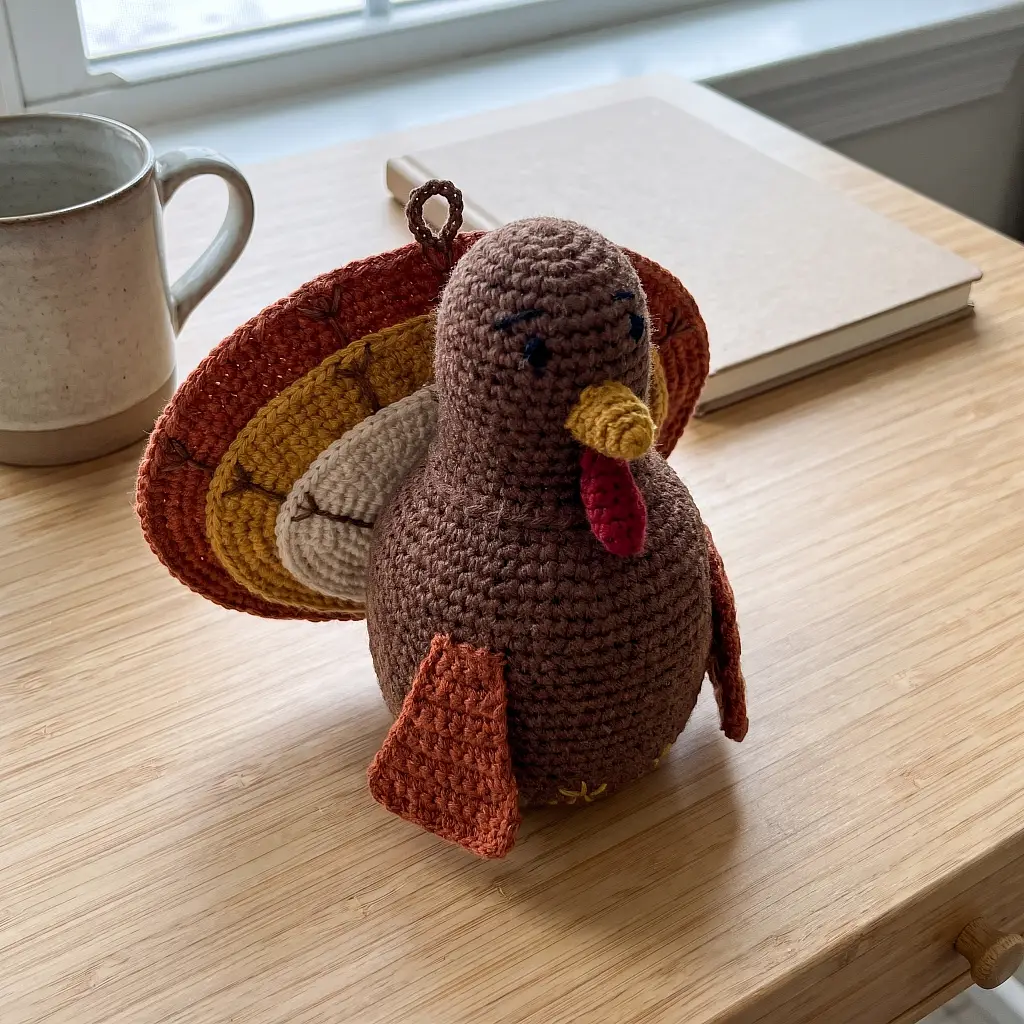
This is a plump brown turkey with a three-layer tail fan, a flat bottom so he stands on his own, and a stitched face. The tail is the part you'll notice first. Instead of separate feathers sewn on one by one, it's three stacked ovals in autumn colors: a rust oval at the back, a gold one in the middle, and a cream one in front.
Each oval carries long brown quill lines that radiate from the lower center out to the edge, with a small V stitched over the end of every line. The line plus its V reads as one feather, so the fan looks like rows of real plumage rather than a flat disc. A small brown chain loop sits at the top of the back layer if you want to hang him.
The body is worked with a flat bottom, and the tail is sewn along its bottom edge and up the center of the back to about mid-body. That's what lets him stand upright on a table without a stand. Two gold stub feet are embroidered side by side on the front of that flat base.
Up top, a brown head is sewn on with two black embroidered eyes and a small straight stitch above each for a brow. A gold beak points out from the face, with a red wattle hanging just under it. A rust wing sits on each side of the body.
This crochet turkey suits a Thanksgiving table, a mantel, or a gift for someone who decorates for fall. Plan on roughly 5 to 8.5 hours in total, which is an estimate rather than a tested time.
What Do You Need to Crochet a Turkey?
You need worsted weight yarn in five colors, a 3.5 mm hook, stuffing, and a few finishing tools. The pattern works the round parts in continuous single crochet and the flat parts back and forth in rows, so the materials list is short.
- Worsted weight (#4) yarn in brown, gold, red, rust, and cream
- 3.5 mm (US E-4) crochet hook
- Polyester stuffing, for the body and head only
- A yarn needle for sewing and embroidery
- Stitch markers, to mark the start of each round
- Optional, for a display piece only: a sealed pouch of poly pellets or a card disc, and a thin card oval
Here are the pattern's facts at a glance. The size, yarn amount, and time are estimates, since this design hasn't been test-made.
| Detail | Harvest Tom Turkey |
|---|---|
| Yarn weight | Worsted (#4) |
| Hook | 3.5 mm (US E-4) |
| Body size | About 3.2 in tall, 3.3 in across (estimate) |
| Yarn amount | About 82 to 122 yd in all (estimate) |
| Time | About 5 to 8.5 hours (estimate) |
| Skill | Easy |
| Brown parts | Body, Head (both stuffed) |
| Other parts | Gold beak and red wattle (hollow); rust, gold, and cream tail layers; 2 rust wings |
Stitches and Techniques You'll Use for This Crochet Turkey
This pattern uses only a handful of crochet moves. We use US terms throughout, so a single crochet is sc, a chain is ch, an increase is inc (two stitches in one stitch), and a decrease is dec (two stitches worked together).
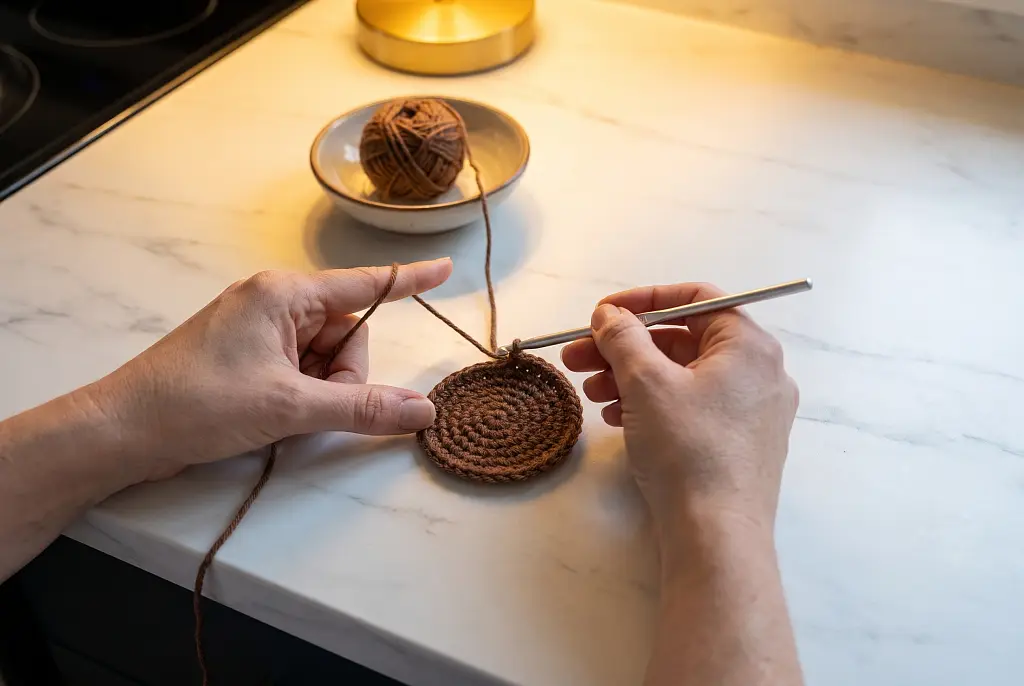
The body, head, beak, and wattle all start with a magic ring, then grow in continuous rounds of sc with a stitch marker at the start of each round and no joins between rounds. The three tail layers each start with a foundation chain (14, 12, and 9 chains for the back, middle, and front) and are worked along both sides of that chain to form an oval.
The wings start with a foundation chain of 4 and then go back and forth in rows of sc. Turn at the end of each row with a ch 1 that doesn't count as a stitch.
The finishing is simple. You sew parts together with a yarn needle, embroider the quill lines, eyes, and feet with straight stitches, and stuff the body and head. The beak and wattle stay hollow. The pattern card further down the page has every round, row, and assembly step with a picture, so we won't repeat them here.
How Do You Keep a Crochet Turkey Standing Up?
You keep a crochet turkey upright with a flat base and a tail anchored up the center of the back to about mid-body. This design builds both in, so the main job is stuffing the body firmly enough to hold its shape without bulging.
Stuff in small pieces and press them into the bottom first, so the base stays level. A lumpy bottom is the usual reason a turkey tips forward. If you're making a display piece, you can press a card disc or a sealed pellet pouch onto the flat bottom while the body is still only lightly stuffed, then finish stuffing above it.
Work at a tight tension so the fill doesn't show through the stitches. If you see white fluff peeking out, go down a hook size for the stuffed parts. When the feathers droop, the fix is usually in the tail rather than the body, which we cover in the next section.
Tips for a Crisp Crochet Turkey Tail
A crisp tail comes from blocking the layers flat and anchoring them well. These steps follow the order you'll meet them.
- Keep your tension even on the tail ovals. Uneven tension makes the edges ripple, and ripples show once the layers are stacked.
- Count your stitches at the end of a round now and then, especially after increases. A missed inc is the common cause of a body that leans.
- Embroider the quill lines and V ends on each tail layer before you stack them. Space the lines evenly so each sits in the gap between the two behind it.
- Block each tail layer flat and damp, then let it dry before stacking. This keeps the fan crisp and upright.
- For a display piece, sandwich a thin card oval, cut a little smaller than the front layer, between the back and middle layers. Sew all the way around so it can't shift.
- Pin the head in place and check that it faces straight forward before you sew. A head sewn on crooked is hard to fix later.
If the fan still flops, check that it is sewn up the center of the back to about mid-body, as step 8 says. A fan held only along its bottom edge will sag.
Make Your Crochet Turkey Yours
You can change the colors freely as long as you stay in worsted weight. A deeper rust and burgundy fan with a mustard body would read as a darker harvest palette. Or try a cream, tan, and sage set for a softer neutral look. Keep the beak and wattle in contrasting colors so the face still reads clearly.
If the turkey is for a baby, a toddler, or anyone who'll play with him, skip the weighted pouch, the base disc, the card stiffener, and the hanging loop, and embroider the eyes. Those extras are for display only. Safety eyes are an option on a display piece or an older child's toy.
Set him on a mantel, a shelf, or the middle of a table. One crochet turkey per place setting makes a handmade favor, and a few in different palettes make a small flock.
Harvest Tom Turkey
A plump worsted turkey with a layered three-color tail fan, bold embroidered quill lines, a flattened weighted base so he stands on his own, and a stitched face.
- SkillEasy
- YarnWorsted (#4)
- Hook3.5 mm (US E-4)
- SizeAbout 3.2 in tall and 3.3 in across (the body, before the other parts are sewn on)*
- YardageAbout 82 to 122 yd in all*
- TimeAbout 5 to 8.5 hours*
Materials
- Worsted weight yarn: brown, about 35 to 55 yd; gold, about 14 to 20 yd; rust, about 25 to 35 yd; cream, about 7 to 10 yd; red, about 1 to 2 yd
- 3.5 mm (US E-4) crochet hook
- Black yarn or embroidery thread for the eyes and brows
- Polyester fiberfill
- Yarn needle and a few pins
- Stitch marker
- For a display piece only: a sealed pouch of poly pellets or a card disc cut to the flat bottom of the body, a thin card oval cut a little smaller than the front tail layer, and brown yarn for a hanging chain
Before you start
- Work at a tight gauge so the stuffing does not show through.
- Block the three tail layers flat and damp before stacking them. This keeps the fan crisp and upright.
- Hold the head in place with pins and check it faces straight forward before you sew.
- Make the quill embroidery bold. The long brown lines run from the lower center of each oval out to its edge, spaced so each line sits in the gap between the two behind it, with a clear V straddling the end of each line at the edge.
- For a baby, a toddler or any turkey meant to be played with, leave out the pellet pouch, the card or plastic base disc, the tail stiffener and the hanging loop, and embroider the eyes. Those extras are for a display piece only.
Abbreviations
US terms: ch = chain · sc = single crochet · inc = 2 sc in the same st · dec = sc 2 together · st = stitch · Rnd = round
The number at the end of each round is its stitch count. Use a stitch marker to find the start of each round. The number at the end of each row is its stitch count. The turning chain never counts as a stitch: work the first stitch of each row into the first st.
Part 1 · Body (brown)
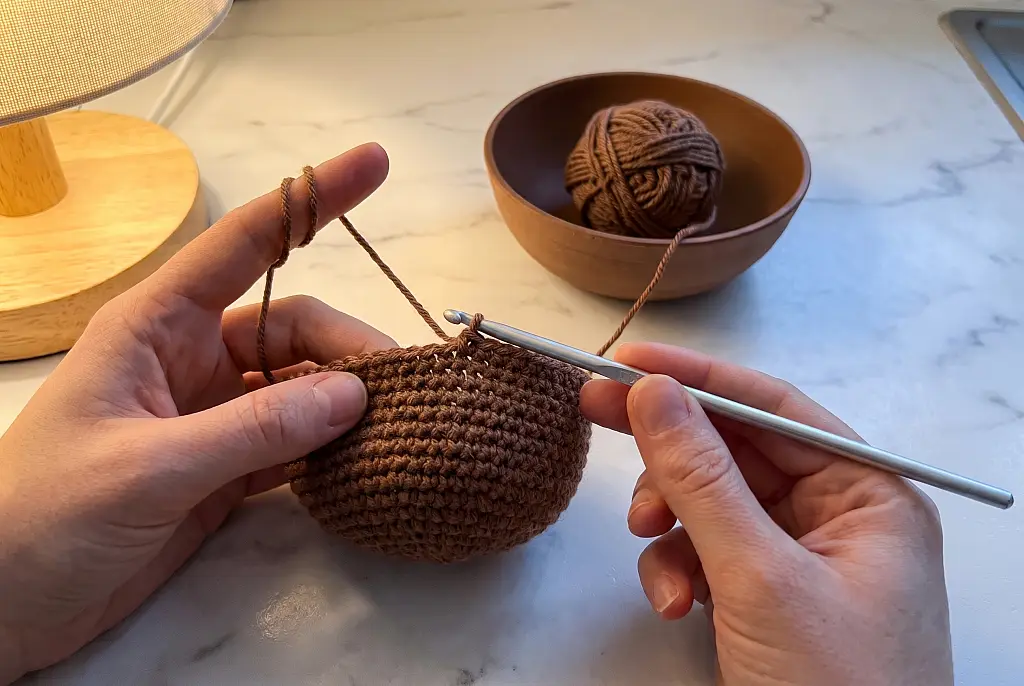
Work the body from the bottom up, stuffing it only lightly as you go so the base can still be pressed flat.
- Rnd 1Magic ring, 6 sc in the ring.6
- Rnd 2Inc in each st around.12
- Rnd 3(Sc 1, inc) × 6.18
- Rnd 4(Sc 2, inc) × 6.24
- Rnd 5Sc 1, inc, (sc 3, inc) × 5, sc 2.30
- Rnd 6(Sc 4, inc) × 6.36
- Rnd 7Sc 5, inc, (sc 11, inc) × 2, sc 6.39
- Rnd 8(Sc 12, inc) × 3.42
- Rnd 9Sc 6, inc, (sc 13, inc) × 2, sc 7.45
- Rnds 10–11Sc in each st around.45
- Rnd 12(Sc 14, inc) × 3.48
- Rnds 13–15Sc in each st around.48
- Rnd 16Sc 7, dec, (sc 14, dec) × 2, sc 7.45
- Rnds 17–18Sc in each st around.45
- Rnd 19(Sc 13, dec) × 3.42
- Rnd 20Sc 2, dec, (sc 5, dec) × 5, sc 3.36
- Rnd 21(Sc 10, dec) × 3.33
- Rnd 22Sc 4, dec, (sc 9, dec) × 2, sc 5.30
Fasten off and weave in the end. Stuff it as the steps below say: the other parts are sewn onto it.
Part 2 · Head (brown)
The head is worked in the same brown. Leave the last round open for sewing to the neck.
- Rnd 1Magic ring, 6 sc in the ring.6
- Rnd 2Inc in each st around.12
- Rnd 3(Sc 1, inc) × 6.18
- Rnd 4(Sc 5, inc) × 3.21
- Rnd 5Sc 3, inc, (sc 6, inc) × 2, sc 3.24
- Rnd 6Sc in each st around.24
- Rnd 7(Sc 7, inc) × 3.27
- Rnds 8–9Sc in each st around.27
- Rnd 10Sc 3, dec, (sc 7, dec) × 2, sc 4.24
- Rnd 11Sc in each st around.24
- Rnd 12(Sc 7, inc) × 3.27
- Rnd 13Sc 4, inc, (sc 8, inc) × 2, sc 4.30
Fasten off, leaving a long tail for sewing. Stuff it firmly before you sew it on.
Part 3 · Beak (gold)
The beak is a small hollow cone. Leave it unstuffed.
- Rnd 1Magic ring, 6 sc in the ring.6
- Rnd 2Sc in each st around.6
- Rnd 3(Sc 1, inc) × 3.9
Fasten off, leaving a long tail for sewing.
Part 4 · Wattle (red)
The wattle is a little hollow red piece that hangs under the beak. Leave it unstuffed.
- Rnd 1Magic ring, 6 sc in the ring.6
- Rnds 2–4Sc in each st around.6
Fasten off, leaving a long tail for sewing.
Part 5 · Back Tail Layer (rust)
This is the largest, rust layer at the back of the fan. Work it as a flat oval.
- Rnd 1Ch 14. Sc in 2nd ch from hook, sc in next 11 ch, 3 sc in last ch; working along the other side of the chain, sc in next 11 ch, 2 sc in last ch.28
- Rnd 2Inc, sc 11, inc × 3, sc 11, inc × 2.34
- Rnd 3Sc 1, inc, sc 11, (sc 1, inc) × 3, sc 11, (sc 1, inc) × 2.40
- Rnd 4Sc 2, inc, sc 11, (sc 2, inc) × 3, sc 11, (sc 2, inc) × 2.46
- Rnd 5Sc 3, inc, sc 11, (sc 3, inc) × 3, sc 11, (sc 3, inc) × 2.52
- Rnd 6Sc 4, inc, sc 11, (sc 4, inc) × 3, sc 11, (sc 4, inc) × 2.58
- Rnd 7Sc 5, inc, sc 11, (sc 5, inc) × 3, sc 11, (sc 5, inc) × 2.64
- Rnd 8Sc 6, inc, sc 11, (sc 6, inc) × 3, sc 11, (sc 6, inc) × 2.70
- Rnd 9Sc 7, inc, sc 11, (sc 7, inc) × 3, sc 11, (sc 7, inc) × 2.76
- Rnd 10Sc 8, inc, sc 11, (sc 8, inc) × 3, sc 11, (sc 8, inc) × 2.82
Fasten off, leaving a long tail for sewing.
Part 6 · Middle Tail Layer (gold)
This gold layer sits in the middle of the fan. Work it as a flat oval.
- Rnd 1Ch 12. Sc in 2nd ch from hook, sc in next 9 ch, 3 sc in last ch; working along the other side of the chain, sc in next 9 ch, 2 sc in last ch.24
- Rnd 2Inc, sc 9, inc × 3, sc 9, inc × 2.30
- Rnd 3Sc 1, inc, sc 9, (sc 1, inc) × 3, sc 9, (sc 1, inc) × 2.36
- Rnd 4Sc 2, inc, sc 9, (sc 2, inc) × 3, sc 9, (sc 2, inc) × 2.42
- Rnd 5Sc 3, inc, sc 9, (sc 3, inc) × 3, sc 9, (sc 3, inc) × 2.48
- Rnd 6Sc 4, inc, sc 9, (sc 4, inc) × 3, sc 9, (sc 4, inc) × 2.54
- Rnd 7Sc 5, inc, sc 9, (sc 5, inc) × 3, sc 9, (sc 5, inc) × 2.60
- Rnd 8Sc 6, inc, sc 9, (sc 6, inc) × 3, sc 9, (sc 6, inc) × 2.66
Fasten off, leaving a long tail for sewing.
Part 7 · Front Tail Layer (cream)
This is the smallest, cream layer at the front of the fan. Work it as a flat oval.
- Rnd 1Ch 9. Sc in 2nd ch from hook, sc in next 6 ch, 3 sc in last ch; working along the other side of the chain, sc in next 6 ch, 2 sc in last ch.18
- Rnd 2Inc, sc 6, inc × 3, sc 6, inc × 2.24
- Rnd 3Sc 1, inc, sc 6, (sc 1, inc) × 3, sc 6, (sc 1, inc) × 2.30
- Rnd 4Sc 2, inc, sc 6, (sc 2, inc) × 3, sc 6, (sc 2, inc) × 2.36
- Rnd 5Sc 3, inc, sc 6, (sc 3, inc) × 3, sc 6, (sc 3, inc) × 2.42
- Rnd 6Sc 4, inc, sc 6, (sc 4, inc) × 3, sc 6, (sc 4, inc) × 2.48
Fasten off, leaving a long tail for sewing.
Part 8 · Wing (rust, make 2)
Make two wings. Each is a small flat panel.
Gauge: 18 sc and 21 rows = 4 in (an estimate).
Check your gauge before you start: crochet a swatch about 5 in square in sc and count its stitches across 4 in. More than 18? Use a bigger hook. Fewer? Use a smaller one. The finished size depends on it.
- Row 1Ch 4. Sc in the 2nd ch from the hook and in each ch across (the skipped chain does not count as a stitch).3
- Row 2Ch 1, turn. Sc in each st across.3
- Row 3Ch 1, turn. Sc in each st across to the last st, 2 sc in the last st.4
- Rows 4–5Ch 1, turn. Sc in each st across.4
- Row 6Ch 1, turn. 2 sc in the first st, sc in each st across.5
- Row 7Ch 1, turn. Sc in each st across.5
- Rows 8–9Repeat Rows 6–7 1 more time.6
- Row 10Ch 1, turn. Sc in each st across.6
Fasten off, leaving a long tail for sewing.
Making it
Assembly, step by step
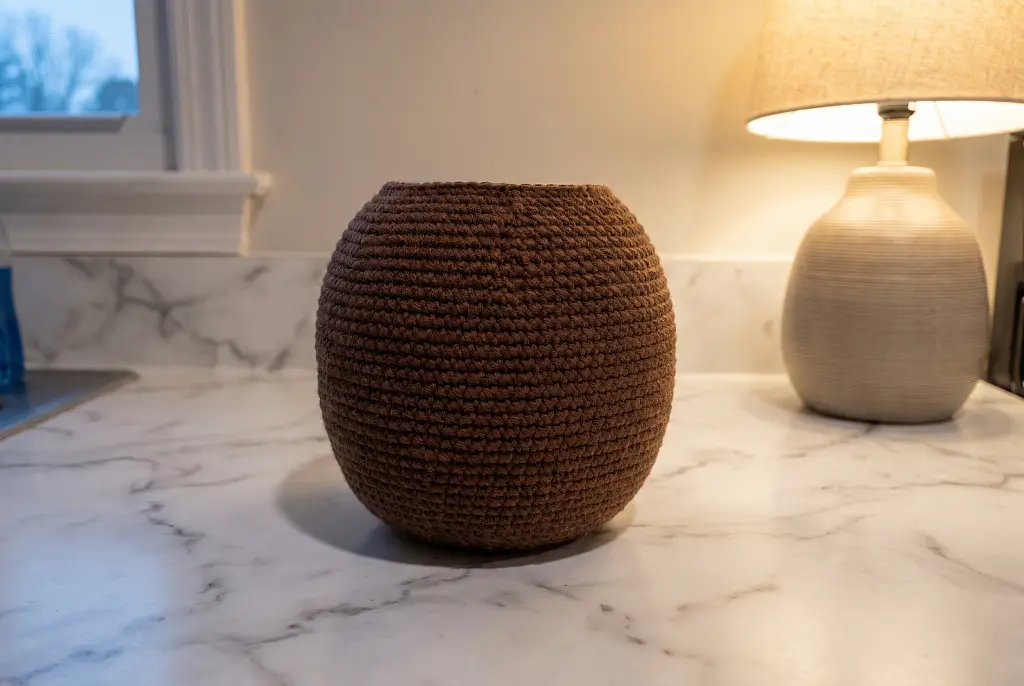 Step 1Work the body
Work the body, leaving the top edge open as the neck, and stuff it only lightly as you go so the bottom can still be pressed flat.
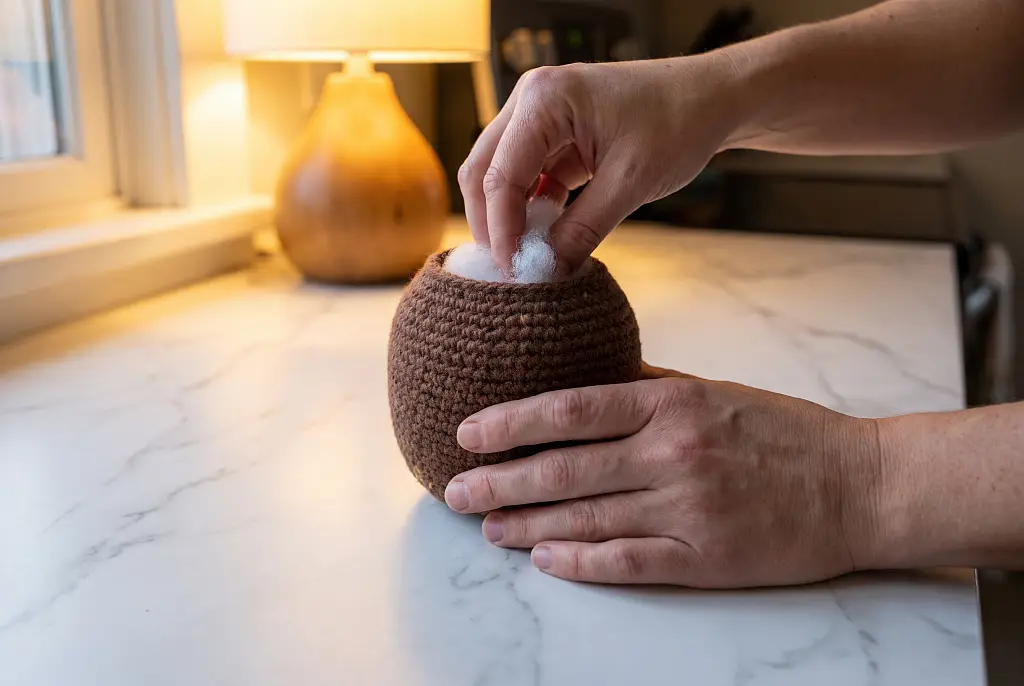 Step 2Press the bottom flat
Press the bottom flat against the table. For a display piece, settle the sealed pellet pouch or card disc down onto it, then pack the stuffing firmly above it so the base stays flat. For a child's toy, use stuffing only and still press the base flat as you fill.
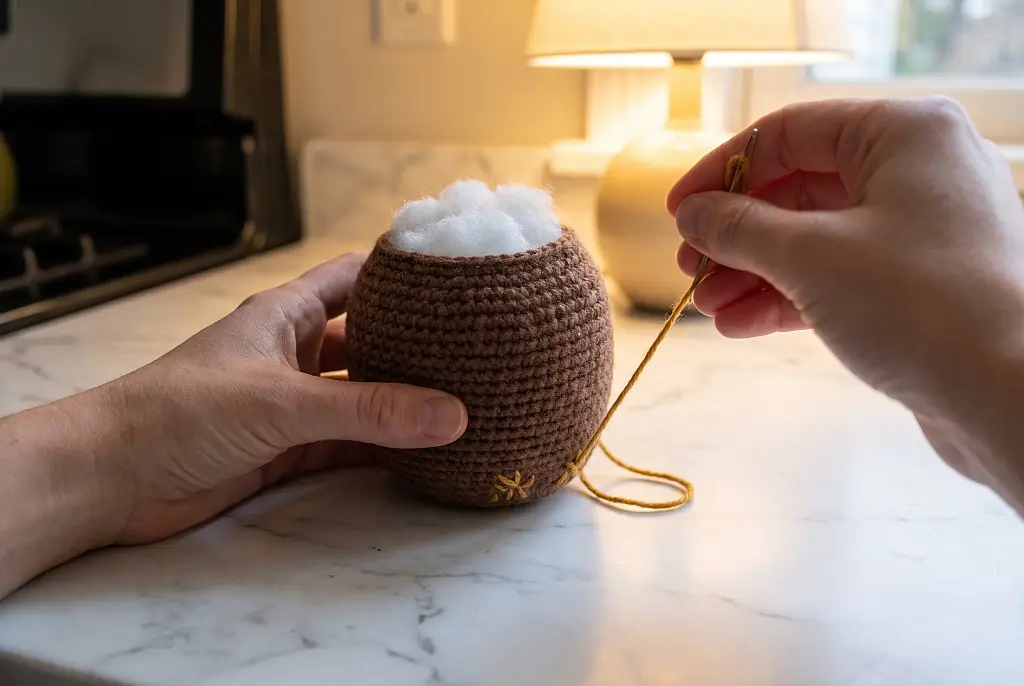 Step 3Embroider the stub feet
Embroider the two stub feet in gold on the front of the flat bottom, side by side, each a small fan of three straight stitches. Stand the body on a table and check it sits level and does not rock. Add or shift stuffing until it does.
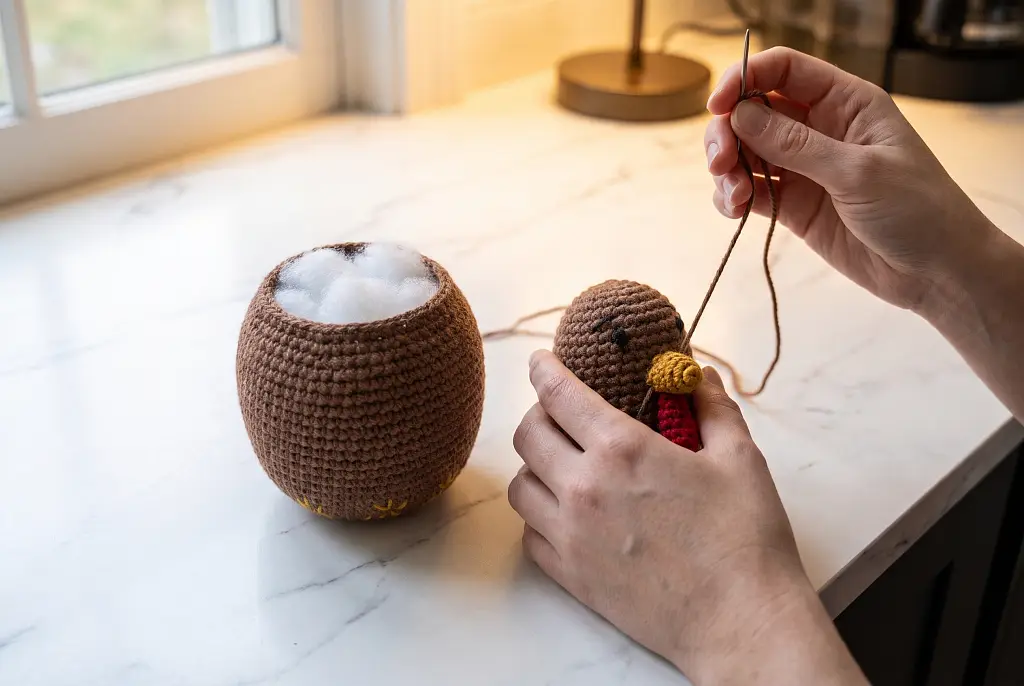 Step 4Make and face the head
Work the head. While the rounds are still open, embroider the pair of black eyes above and to either side of the beak position, with a small straight stitch above each for a brow. Then stuff the head, sew the beak on the front of the face pointing outward, and sew the wattle just under the beak so it hangs down.
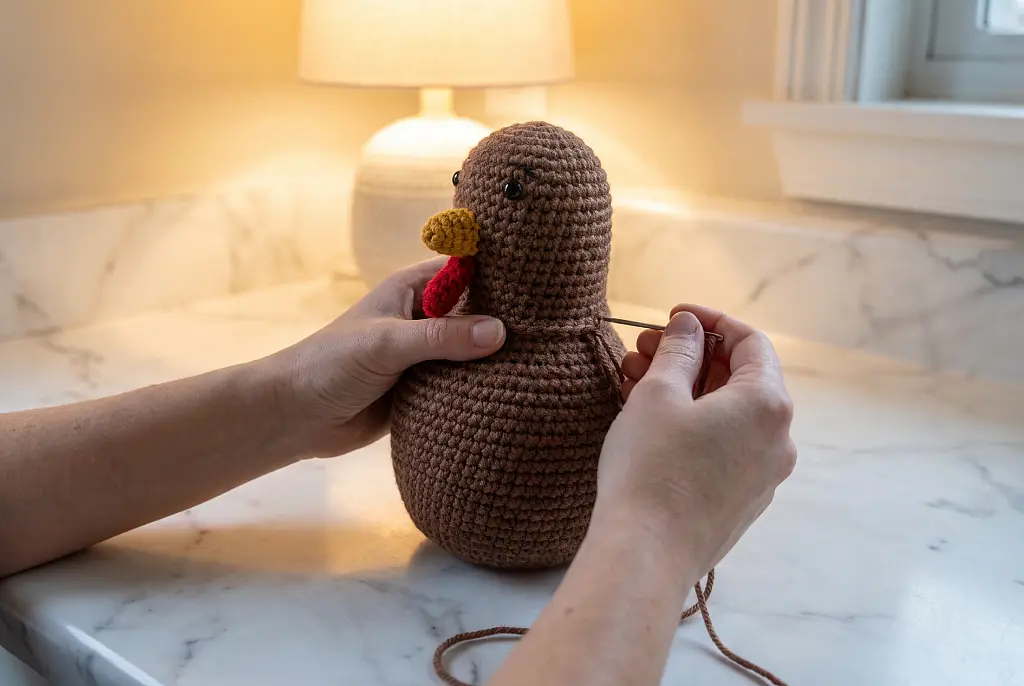 Step 5Sew head to body
Sew the open last round of the head over the open neck edge at the top of the body, face turned forward, adding a little more stuffing as you close the seam. Stand the turkey again and check it is still balanced before you go on.
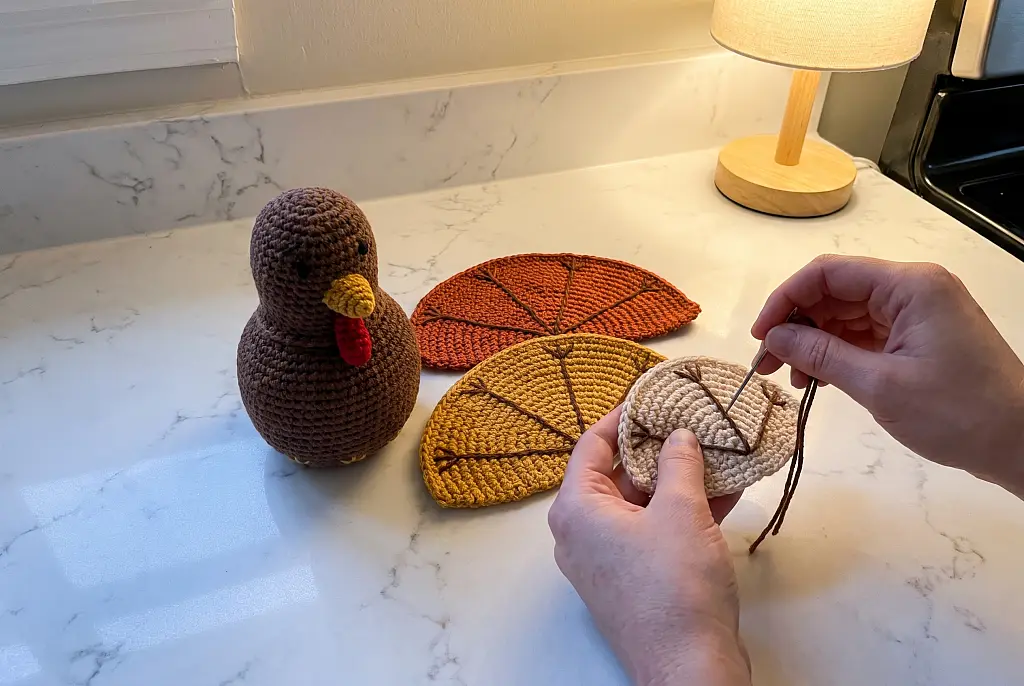 Step 6Embroider the tail ovals
Work the three ovals. Across the face of each one, embroider the long brown quill lines radiating from the lower center out to the edge, with a clear V at the end of every line.
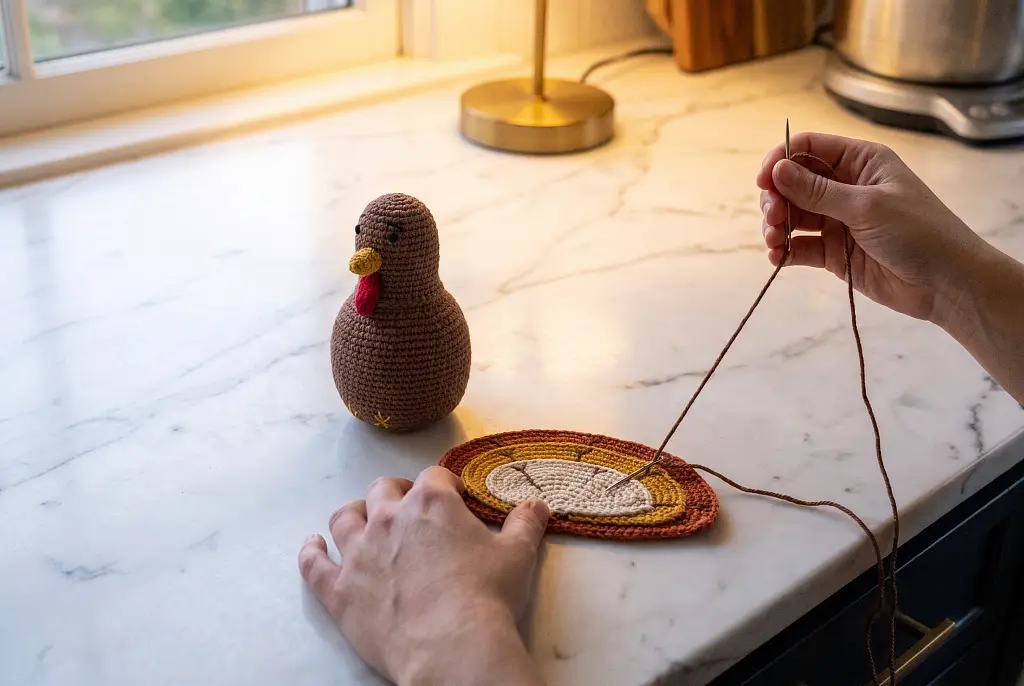 Step 7Stack the tail fan
Lay the ovals with the largest at the back and the smallest in front, lining up their bottom edges so the bigger layers rise evenly above and around the one in front. For a display piece, slip the card oval between the back and middle layers. Sew each layer to the one behind it all the way around its edge so nothing can shift or slide out.
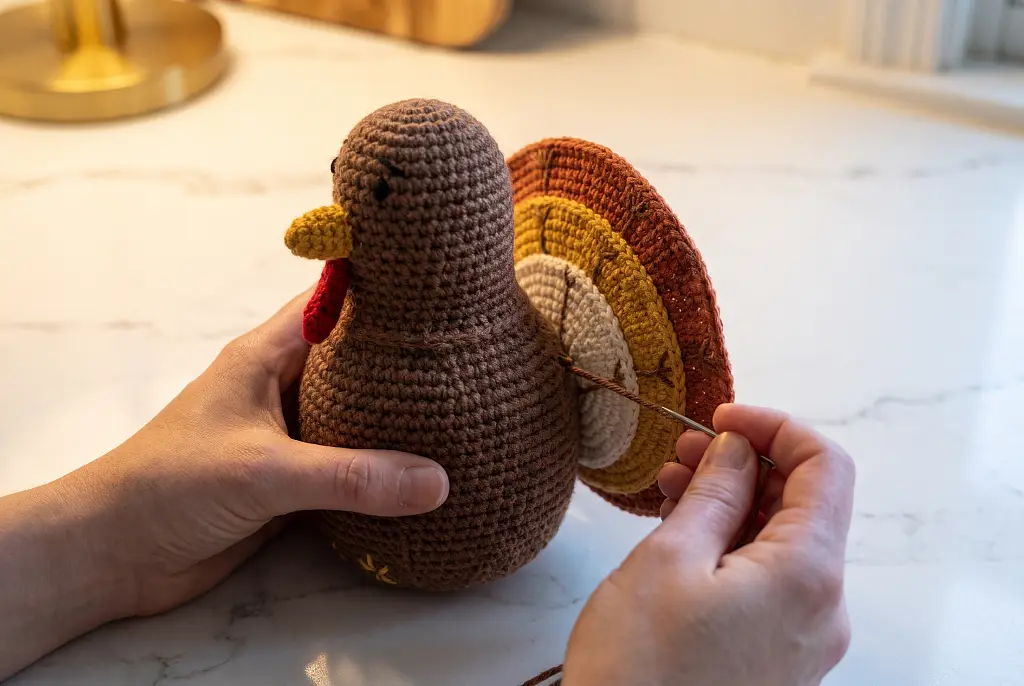 Step 8Sew the fan on
Hold the stacked fan flat against the back of the body. Stand the turkey to check the fan tilts back a little and the bird still stands. Then sew the fan on all along its bottom edge and straight up the center of the back to about mid-body, so it is anchored upright and cannot flop backward.
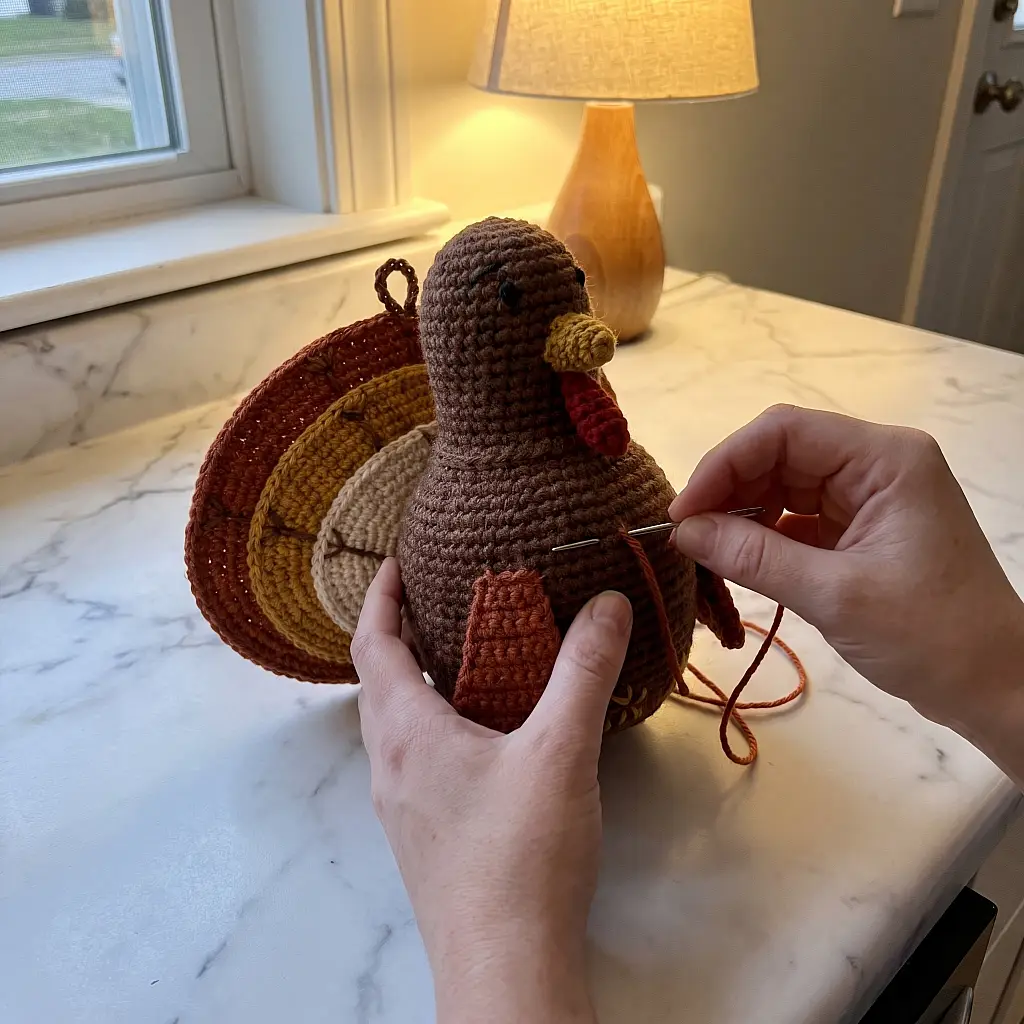 Step 9Sew on the wings
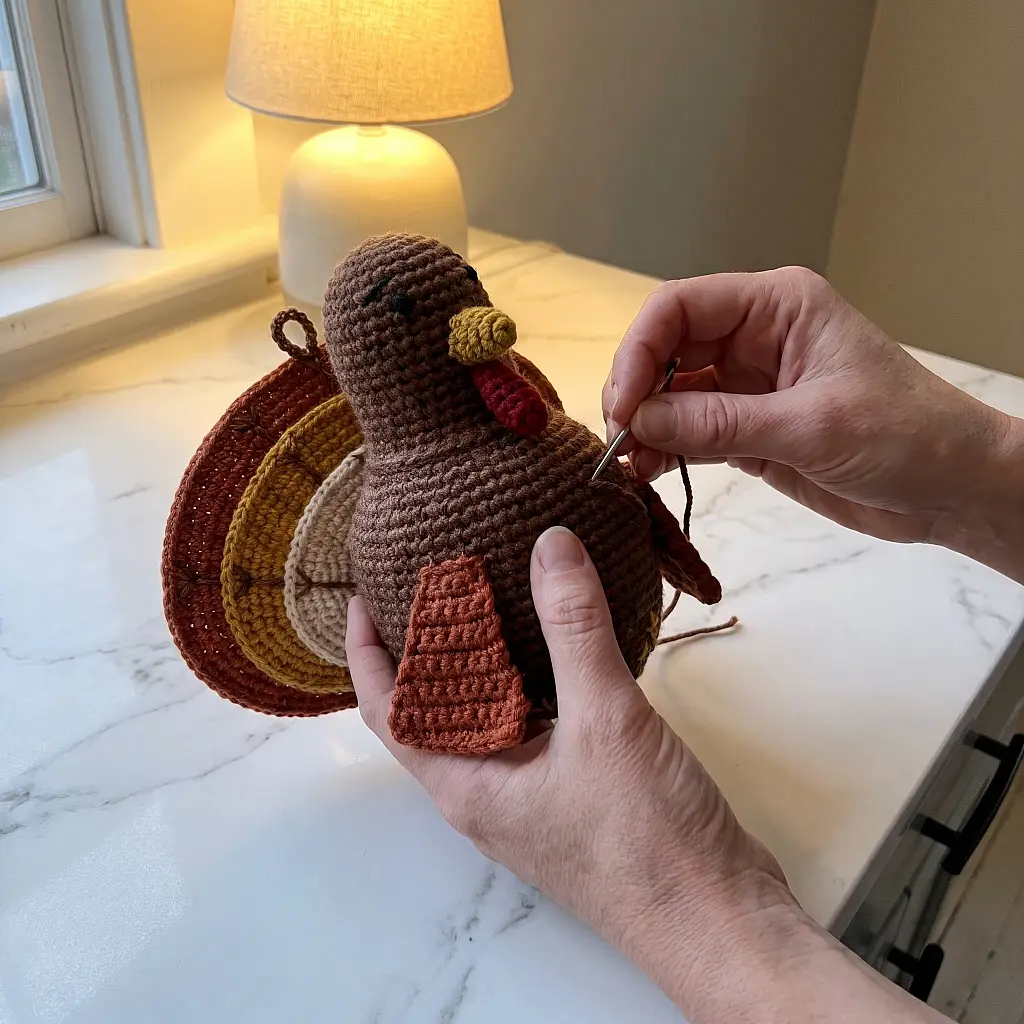
Sew a wing to each side of the body with the narrow end at the shoulder and the wide end pointing back. For a display piece, add a brown chain hanging loop at the top of the back tail layer.
 Step 10Weave in ends
Weave in all ends.
Finishing
- Check every seam by tugging gently on each part. The head, beak, wattle, wings and fan should all feel firmly attached.
- Set Tom on a table one last time and make sure he stands level, then fluff the fan and tuck in any stray ends.
If Tom is for a child under 3, embroider the eyes and every small feature. Never use safety eyes, buttons or beads. Sew every part on firmly, and leave out the pellet pouch, card base, card stiffener and hanging loop.
Pattern © HookRow. Free to make, and to sell what you make; please link to this page rather than copying the pattern.
Frequently Asked Questions
How to crochet a turkey for beginners?
Start with an Easy pattern that uses only single crochet, like HookRow's Harvest Tom Turkey. The round parts begin with a magic ring and the flat parts with a short chain. Take your time stuffing and sewing, and follow the pattern card above for each round and assembly step. Counting stitches as you go keeps your first crochet turkey even.
What yarn and hook size should I use to crochet a turkey?
Use worsted weight (#4) yarn with a 3.5 mm (US E-4) hook. That's what this crochet turkey pattern calls for, in brown, gold, red, rust, and cream. The hook is a little small for the yarn on purpose, so the stitches come out tight and the stuffing doesn't show through. Plan on about 82 to 122 yd in all.
How long does it take to crochet a turkey?
This turkey takes about 5 to 8.5 hours by the pattern's estimate. That covers all eight parts plus the embroidery and assembly. The pattern hasn't been test-made, so treat it as a range. A newer maker may land toward the longer end, and blocking time for the tail layers is extra.
Is a crochet turkey easy enough for a beginner?
Yes, this crochet turkey is rated Easy. It uses only single crochet, increases, decreases, and chains, plus simple sewing and straight-stitch embroidery. The magic ring takes a little practice, and the layered tail needs patience to line up. Nothing in it is technically hard, and each step is shown in a picture on the card above.
Ready to Make Your Crochet Turkey
If you want a turkey that stands on its own and shows off a real feathered fan, our recommendation is to make Harvest Tom Turkey as written, with the flat base and the full three-layer tail. Block the layers before you stack them and sew the fan up the center of the back, and he'll stay upright for the whole season. Scroll back up to the pattern card, gather your five colors of worsted yarn, and start your crochet turkey with the magic ring for the body.