Crochet Beanie Pattern: Worsted Weight Hat in 6 Sizes
Work this crochet beanie top down in a spiral, add a blush ribbed band, a milk white pom-pom and a small flower. Six sizes, from baby to adult L.
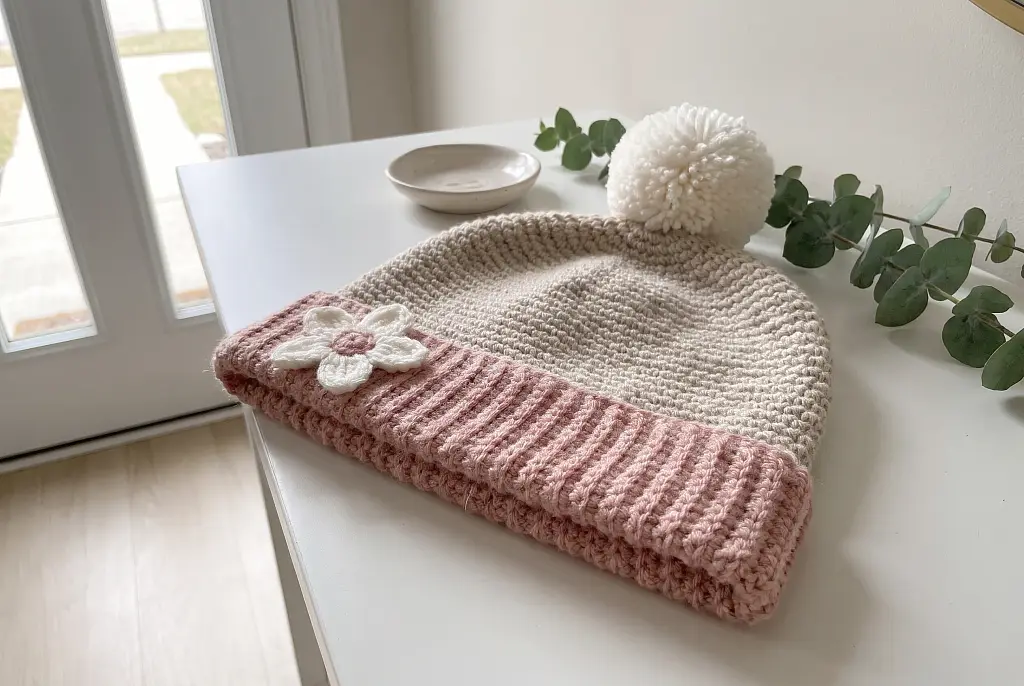
A crochet beanie that fits snugly, holds its shape and carries a little flower on the brim is exactly what HookRow's "Sandcloud Fitted Beanie" is. It's an easy pattern, worked in worsted weight yarn with a 5.0 mm hook, and the free pattern is further down the page.
Here's the short version: this crochet beanie is made in six sizes, from Baby (head 16 in) to Adult L (head 23.5 in). The pattern estimates about 53 to 139 yd of yarn in all and about 3 to 7 hours of work, depending on size. Skill level is Easy.
Below we cover how the design is built, what to gather, how to choose a size, and how to avoid the problems that fitted hats tend to have.
What Is the Sandcloud Fitted Crochet Beanie?
The Sandcloud Fitted Beanie is a snug single crochet cap in sand, with a blush pink ribbed band at the edge, a milk white pom-pom on top and one small flat flower sewn at the side of the brim. It's a fitted shape, not a slouchy one, and it sits close to the head.
What sets this design apart is its construction. The hat is worked from the crown down in a continuous spiral, which gives a smooth, flat-topped cap with no seam running up the side. The band is made separately, flat, in rows, and sewn on afterward, so the ribs run up and down rather than around.
The flower is the extra touch: five milk white petals around a blush pink center, sewn onto the band at one side. For a child's hat, the pattern also gives a safer option, with embroidered petals worked as straight stitches around a French knot instead of a sewn-on flower.
It suits anyone who wants a classic, close-fitting winter hat, and it works well as a handmade gift for a child or an adult. Because every size is built the same way, a matching set for a family is easy to plan. Time depends on size: the pattern estimates about 3 hours for the smallest and about 7 for the largest, and those are estimates, not measured times.
What Do You Need Before You Start Your Crochet Beanie?
You need three colors of worsted weight yarn, one hook and a few small tools. Here's the list for this pattern:
- Worsted weight (#4) yarn in sand, blush pink and milk white for the crochet beanie
- A 5.0 mm (US H-8) crochet hook
- A yarn needle for sewing the band and the flower
- A stitch marker to mark the start of each round
The table gives the pattern's facts at a glance. Remember that the yarn amount and time are estimates by size, because this pattern hasn't been test-made.
| Detail | This pattern |
|---|---|
| Yarn weight | Worsted (#4) |
| Hook | 5.0 mm (US H-8) |
| Sizes | 6, Baby to Adult L |
| Yarn in all | About 53 to 139 yd, by size (estimate) |
| Time | About 3 to 7 hours, by size (estimate) |
| Skill | Easy |
| Parts | Beanie (sand), band (blush pink), 5 petals (milk white), center (blush pink) |
Stitches and techniques
We use US terms throughout. The hat uses a magic ring, then single crochet (sc) in a spiral with increases (inc), with no joins between rounds. The band starts with a foundation chain (ch), then works rows of sc in the back loop only (BLO), turning each row with a ch 1 that doesn't count as a stitch. The petals and flower center are small flat pieces, and assembly uses a yarn needle, straight stitches and French knots.
How Do You Choose the Right Size?
Measure around the head at the forehead, just above the ears, and pick the size closest to that number. This crochet beanie is made a little smaller than the head it fits, so it stays on without slipping.
The six sizes are Baby (head 16 in), Toddler (18 in), Child (20 in), Teen / Adult S (21 in), Adult M (22 in) and Adult L (23.5 in). Each one has its own block and its own row in the pattern's size table, with the yarn and time for that size, so check there before you buy yarn.
If a head falls between two sizes, think about how the hat will be worn. A person who likes a very snug cap can take the smaller one. Someone who wants to tuck hair underneath will be happier with the larger. Either way, a fitted hat leans on the stretch of the band, so don't size up by a lot, or the crown will sit loose.
For a baby or a growing child, it's tempting to choose a bigger size so the hat lasts. We'd steer you away from that here. A fitted beanie that's too large loses its shape and slides over the eyes, and a snug one is both safer and neater.
What Makes This Crochet Beanie Come Out Right?
Gauge decides the fit, so work a small swatch before you start. This pattern asks for a firm single crochet, and if yours runs loose, the pattern's own advice is to go down one hook size. A loose fabric will stretch and sag rather than hold the fitted shape.
These tips are listed in the order you'll meet them:
- Measure the head first. Use the forehead measurement and choose the closest size, as above.
- Swatch in single crochet. If the swatch feels floppy, drop a hook size. Firm fabric is what keeps the crown flat.
- Mark every round. Because the hat is a spiral with no joins, the stitch marker is how you keep your place. Move it up as you finish each round.
- Work the band in the back loop only. That's what forms the ribs. If no ridges appear, recheck where the hook goes: the back loop is the one furthest from you as the row faces you.
- Keep the band's edges even. Turn each row with a ch 1 that doesn't count as a stitch, so the sides stay straight and don't flare.
- Try it on before sewing. Hold the band against the hat and against a head, if you can, then sew.
- Sew the seams loosely. A tight seam kills the stretch. Keep your sewing relaxed, so the band can give a little when the hat goes on.
The most common mistake with a fitted hat is a flat crown that curls into a bowl or ruffles into a frill. Both come from the increases, not the yarn. Too few increases cup the crown, too many ruffle it, so follow the pattern's counts closely and lay the circle flat as you go to check.
The second is a hat that's too tight to pull on. That usually means a tight band seam. Loosen the stitching and the band will stretch to fit.
How Do You Finish and Attach the Details on a Crochet Beanie?
The finishing is where this beanie gets its look, so take your time. The pom-pom goes on the very top of the crown, sewn firmly through its center, with the tails knotted on the inside so it can't work loose.
For the flower, the pattern's note is worth following closely, especially on a child's hat: sew it down all the way around the center and through every petal end, so nothing lifts. A petal that's tacked at the base will flop and catch on things.
If the hat is for a baby or young child, use the embroidered version instead. A small ring of straight stitches worked around a blush pink French knot sits flat on the band and has no loose parts, which is the safer choice for little ones.
Weave in every end before you wear the hat, and bury them where the band meets the hat or inside the band's ribs, since those spots hide them best. The pattern card has all five assembly steps, with pictures for four of them. We'd rather you follow those than a summary here.
How Can You Make Your Crochet Beanie Your Own?
Color is the easiest change, and it costs you nothing in fit. Keep the same worsted weight yarn and swap the three colors to suit the wearer: a deep forest crown with a mustard band, or a gray hat with a soft pink flower. Just keep enough contrast between the band and the hat so the ribs read clearly.
Fiber changes the feel without changing the pattern. Acrylic is very warm and easy to wash, wool is warm but more breathable, and cotton is cool and breathable for a mild-weather hat. If you change fiber, swatch again, because the gauge may shift.
This beanie makes a good gift. It's quick enough to finish for a birthday or a holiday, and a matching set for a parent and child is simple, since every size follows the same plan. A hat for a baby can carry the embroidered flower, and one for an adult can keep the sewn-on petals.
One practical suggestion: if you're unsure which color the person likes, pick a neutral crown like sand and let the band and flower carry the color.
Sandcloud Fitted Beanie
A snug sand beanie with a blush ribbed band, a milk white pom-pom and a small flat flower on the brim.
- SkillEasy
- YarnWorsted (#4)
- Hook5.0 mm (US H-8)
- Size6 sizes, Baby (head 16 in) to Adult L (head 23.5 in)*
- YardageAbout 53 to 139 yd in all, by size*
- TimeAbout 3 to 7 hours, by size*
Sizes
| Size | Finished* | Yarn* | Time* |
|---|---|---|---|
| Baby (head 16 in) | The hat is about 14.5 in around and 6.5 in from the top to its edge, its ribbed band about 14 in around before it stretches and 1.25 in deep | sand 35–50 yd, blush pink 12–18 yd, milk white 6–9 yd | 3 to 5 hours |
| Toddler (head 18 in) | The hat is about 16 in around and 7 in from the top to its edge, its ribbed band about 15.5 in around before it stretches and 1.5 in deep | sand 40–60 yd, blush pink 16–25 yd, milk white 6–9 yd | 3 to 5.5 hours |
| Child (head 20 in) | The hat is about 18 in around and 7.5 in from the top to its edge, its ribbed band about 17 in around before it stretches and 1.75 in deep | sand 45–70 yd, blush pink 18–25 yd, milk white 6–9 yd | 3.5 to 6 hours |
| Teen / Adult S (head 21 in) | The hat is about 19 in around and 8 in from the top to its edge, its ribbed band about 18 in around before it stretches and 2 in deep | sand 50–75 yd, blush pink 20–30 yd, milk white 6–9 yd | 3.5 to 6 hours |
| Adult M (head 22 in) | The hat is about 20 in around and 9 in from the top to its edge, its ribbed band about 19 in around before it stretches and 2.25 in deep | sand 55–85 yd, blush pink 25–40 yd, milk white 6–9 yd | 4 to 6.5 hours |
| Adult L (head 23.5 in) | The hat is about 21 in around and 9 in from the top to its edge, its ribbed band about 20 in around before it stretches and 2.5 in deep | sand 55–85 yd, blush pink 30–45 yd, milk white 6–9 yd | 4 to 7 hours |
To choose your size, measure around the head at the forehead, just above the ears, and pick the size closest to it: each hat is made a little smaller than its head so it stays on.
Materials
- Worsted weight yarn in three colors: sand (the main color), blush pink and milk white. For an Adult M, plan on about 55–85 yd of sand, about 25–40 yd of blush pink and about 6–9 yd of milk white. Each size's yarn amounts are in the size table.
- 5.0 mm (US H-8) crochet hook
- Yarn needle for sewing the band on and weaving in ends
- Stitch marker, to keep your place in the spiral
- Scissors
- Optional: a pom-pom maker or a piece of cardboard for winding the pom-pom (not for Baby or Toddler)
Before you start
- This hat comes in 6 sizes, from Baby to Adult L. Each size's yarn and time are in the size table.
- To choose a size, measure around the head at the forehead, just above the ears, and pick the size whose head measure is closest. Each size is made a little smaller than the head so it stays on (an estimate).
- For reference, the Adult M fits a head of about 22 in. The hat is about 20 in around and 9 in from the top to its edge, and the ribbed band is about 19 in around before it stretches and 2.25 in deep. It takes about 4 to 6.5 hours.
- The cap is worked in a continuous spiral, so use a stitch marker to mark the start of each round and move it up as you go.
- Work the crown firmly so the fabric holds its shape. If your single crochet runs loose, go down one hook size.
- The band is worked in the back loop only, which creates the ribbing. Its ribs run up the hat, because the band is worked sideways.
- Baby and Toddler sizes get no pom-pom and no sewn-on flower. They get only the embroidered flower, which cannot come loose.
- On a child's hat, sew the flower down all the way around the center and through every petal end so nothing lifts.
Abbreviations
US terms: ch = chain · sl st = slip stitch · sc = single crochet · inc = 2 sc in the same st · st = stitch · Rnd = round
The number at the end of each round is its stitch count. Use a stitch marker to find the start of each round. The number at the end of each row is its stitch count. The turning chain never counts as a stitch: work the first stitch of each row into the first st.
Part 1 · Beanie (sand)
The beanie is worked from the top down in a spiral of single crochet: a flat crown first, then even rounds down to the edge.
Gauge: 12 sc and 14 rounds = 4 in (an estimate).
Check your gauge before you start: crochet a swatch about 5 in square in sc and count its stitches across 4 in. More than 12? Use a bigger hook. Fewer? Use a smaller one. The finished size depends on it.
All sizes
Crown
- Rnd 1Magic ring, 6 sc in the ring.6
- Rnd 2Inc in each st around.12
- Rnd 3(Sc 1, inc) × 6.18
- Rnd 4(Sc 2, inc) × 6.24
- Rnd 5Sc 1, inc, (sc 3, inc) × 5, sc 2.30
- Rnd 6(Sc 4, inc) × 6.36
- Rnd 7Sc 2, inc, (sc 5, inc) × 5, sc 3.42
Then follow the block of your size.
Baby (head 16 in)
Beanie, from Rnd 8
- Rnd 8(Sc 13, inc) × 3.45
Sides
- Rnds 9–18Sc in each st around.45
Fasten off and weave in the end.
Band (blush pink) · Gauge: 12 sc in the back loops and 14 rows = 4 in
- Row 1Ch 5. Sc in the 2nd ch from the hook and in each ch across (the skipped chain does not count as a stitch).4
- Rows 2–49Ch 1, turn. Sc in the back loop only of each st across.4
Fasten off, leaving a long tail for sewing.
Putting it together
- Bring Row 1 and Row 49 of the Band together, wrong side out, and sew them (or sl st through both loops) to make a ring; leave it wrong side out.
- Slip the band's ring, still wrong side out, over the last round of the hat, right sides together, the band's seam at the back. With a new length of yarn (about 50 in), sew one edge of the band (its row ends) to the last round of the hat with a whip stitch, easing the hat's 45 sts evenly into the band's 49 row ends. Turn the band down, so its right side faces out, and weave in the ends.
Toddler (head 18 in)
Beanie, from Rnd 8
- Rnd 8(Sc 6, inc) × 6.48
- Rnd 9Sc 7, inc, (sc 15, inc) × 2, sc 8.51
Sides
- Rnds 10–19Sc in each st around.51
Fasten off and weave in the end.
Band (blush pink) · Gauge: 12 sc in the back loops and 14 rows = 4 in
- Row 1Ch 6. Sc in the 2nd ch from the hook and in each ch across (the skipped chain does not count as a stitch).5
- Rows 2–55Ch 1, turn. Sc in the back loop only of each st across.5
Fasten off, leaving a long tail for sewing.
Putting it together
- Bring Row 1 and Row 55 of the Band together, wrong side out, and sew them (or sl st through both loops) to make a ring; leave it wrong side out.
- Slip the band's ring, still wrong side out, over the last round of the hat, right sides together, the band's seam at the back. With a new length of yarn (about 55 in), sew one edge of the band (its row ends) to the last round of the hat with a whip stitch, easing the hat's 51 sts evenly into the band's 55 row ends. Turn the band down, so its right side faces out, and weave in the ends.
Child (head 20 in)
Beanie, from Rnd 8
- Rnd 8(Sc 6, inc) × 6.48
- Rnd 9Sc 3, inc, (sc 7, inc) × 5, sc 4.54
- Rnd 10(Sc 26, inc) × 2.56
Sides
- Rnds 11–21Sc in each st around.56
Fasten off and weave in the end.
Band (blush pink) · Gauge: 12 sc in the back loops and 14 rows = 4 in
- Row 1Ch 6. Sc in the 2nd ch from the hook and in each ch across (the skipped chain does not count as a stitch).5
- Rows 2–61Ch 1, turn. Sc in the back loop only of each st across.5
Fasten off, leaving a long tail for sewing.
Putting it together
- Bring Row 1 and Row 61 of the Band together, wrong side out, and sew them (or sl st through both loops) to make a ring; leave it wrong side out.
- Slip the band's ring, still wrong side out, over the last round of the hat, right sides together, the band's seam at the back. With a new length of yarn (about 60 in), sew one edge of the band (its row ends) to the last round of the hat with a whip stitch, easing the hat's 56 sts evenly into the band's 61 row ends. Turn the band down, so its right side faces out, and weave in the ends.
Teen / Adult S (head 21 in)
Beanie, from Rnd 8
- Rnd 8(Sc 6, inc) × 6.48
- Rnd 9Sc 3, inc, (sc 7, inc) × 5, sc 4.54
- Rnd 10(Sc 8, inc) × 6.60
Sides
- Rnds 11–21Sc in each st around.60
Fasten off and weave in the end.
Band (blush pink) · Gauge: 12 sc in the back loops and 14 rows = 4 in
- Row 1Ch 7. Sc in the 2nd ch from the hook and in each ch across (the skipped chain does not count as a stitch).6
- Rows 2–64Ch 1, turn. Sc in the back loop only of each st across.6
Fasten off, leaving a long tail for sewing.
Putting it together
- Bring Row 1 and Row 64 of the Band together, wrong side out, and sew them (or sl st through both loops) to make a ring; leave it wrong side out.
- Slip the band's ring, still wrong side out, over the last round of the hat, right sides together, the band's seam at the back. With a new length of yarn (about 60 in), sew one edge of the band (its row ends) to the last round of the hat with a whip stitch, easing the hat's 60 sts evenly into the band's 64 row ends. Turn the band down, so its right side faces out, and weave in the ends.
Adult M (head 22 in)
Beanie, from Rnd 8
- Rnd 8(Sc 6, inc) × 6.48
- Rnd 9Sc 3, inc, (sc 7, inc) × 5, sc 4.54
- Rnd 10(Sc 8, inc) × 6.60
- Rnd 11Sc 14, inc, sc 29, inc, sc 15.62
Sides
- Rnds 12–23Sc in each st around.62
Fasten off and weave in the end.
Band (blush pink) · Gauge: 12 sc in the back loops and 14 rows = 4 in
- Row 1Ch 8. Sc in the 2nd ch from the hook and in each ch across (the skipped chain does not count as a stitch).7
- Rows 2–67Ch 1, turn. Sc in the back loop only of each st across.7
Fasten off, leaving a long tail for sewing.
Putting it together
- Bring Row 1 and Row 67 of the Band together, wrong side out, and sew them (or sl st through both loops) to make a ring; leave it wrong side out.
- Slip the band's ring, still wrong side out, over the last round of the hat, right sides together, the band's seam at the back. With a new length of yarn (about 60 in), sew one edge of the band (its row ends) to the last round of the hat with a whip stitch, easing the hat's 62 sts evenly into the band's 67 row ends. Turn the band down, so its right side faces out, and weave in the ends.
Adult L (head 23.5 in)
Beanie, from Rnd 8
- Rnd 8(Sc 6, inc) × 6.48
- Rnd 9Sc 3, inc, (sc 7, inc) × 5, sc 4.54
- Rnd 10(Sc 8, inc) × 6.60
- Rnd 11Sc 4, inc, (sc 9, inc) × 5, sc 5.66
Sides
- Rnds 12–22Sc in each st around.66
Fasten off and weave in the end.
Band (blush pink) · Gauge: 12 sc in the back loops and 14 rows = 4 in
- Row 1Ch 9. Sc in the 2nd ch from the hook and in each ch across (the skipped chain does not count as a stitch).8
- Rows 2–72Ch 1, turn. Sc in the back loop only of each st across.8
Fasten off, leaving a long tail for sewing.
Putting it together
- Bring Row 1 and Row 72 of the Band together, wrong side out, and sew them (or sl st through both loops) to make a ring; leave it wrong side out.
- Slip the band's ring, still wrong side out, over the last round of the hat, right sides together, the band's seam at the back. With a new length of yarn (about 65 in), sew one edge of the band (its row ends) to the last round of the hat with a whip stitch, easing the hat's 66 sts evenly into the band's 72 row ends. Turn the band down, so its right side faces out, and weave in the ends.
Part 2 · Flower petal (milk white, make 5)
Make 5 of these small flat ovals in milk white. They become the petals of the flower.
- Rnd 1Ch 5. Sc in 2nd ch from hook, sc in next 2 ch, 3 sc in last ch; working along the other side of the chain, sc in next 2 ch, 2 sc in last ch.10
Fasten off, leaving a long tail for sewing.
Part 3 · Flower center (blush pink)
A tiny blush pink circle that sits over the inner ends of the petals.
- Rnd 1Magic ring, 6 sc in the ring.6
Fasten off, leaving a long tail for sewing.
Making it
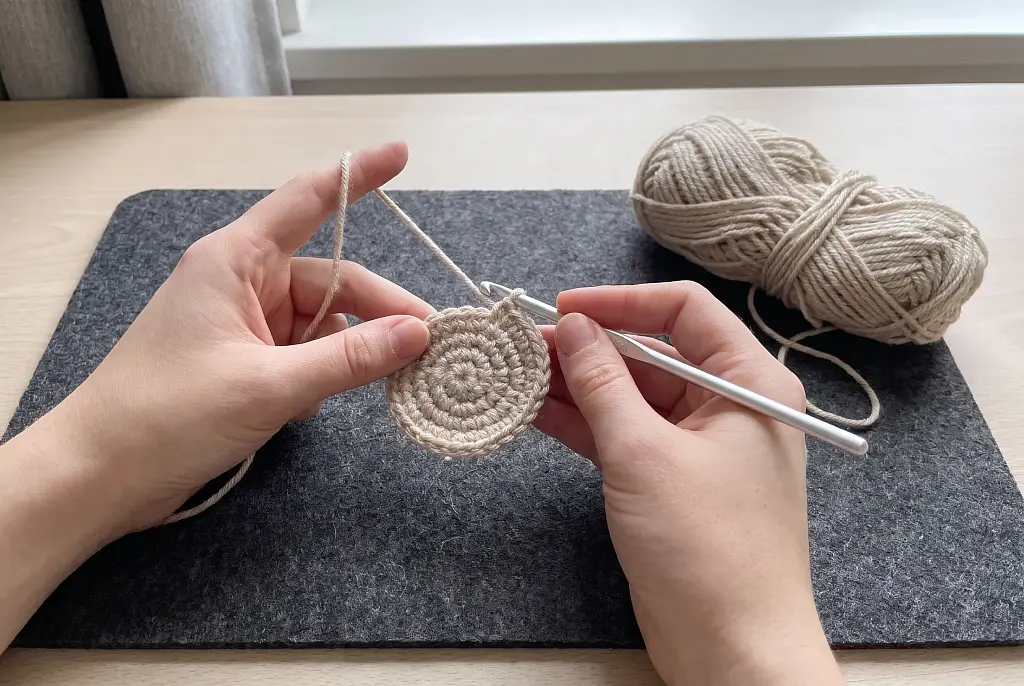
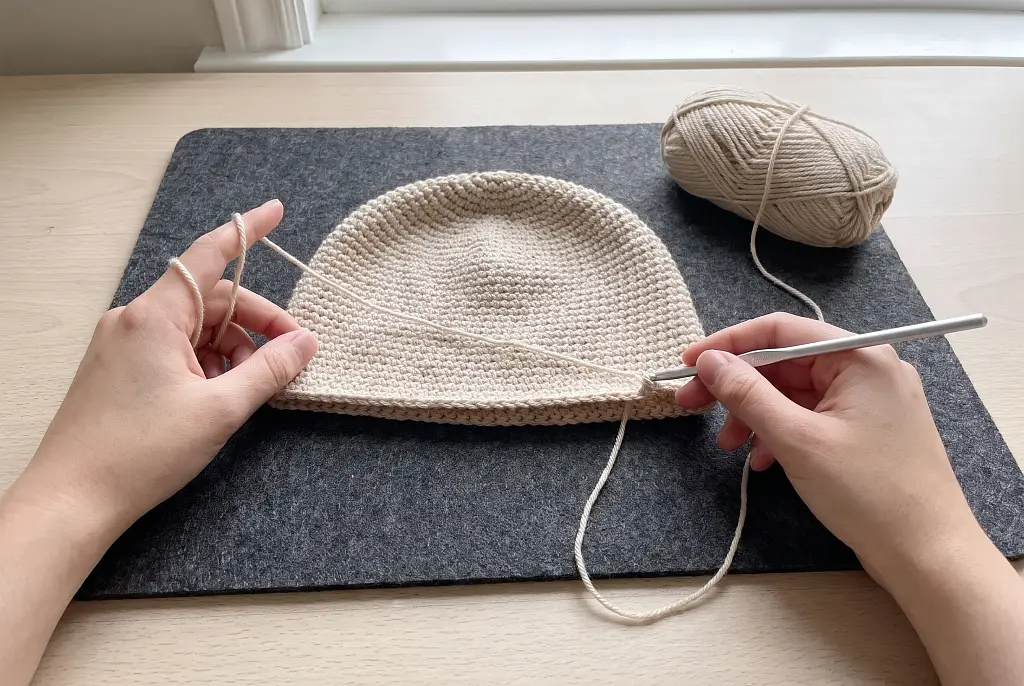
Assembly, step by step
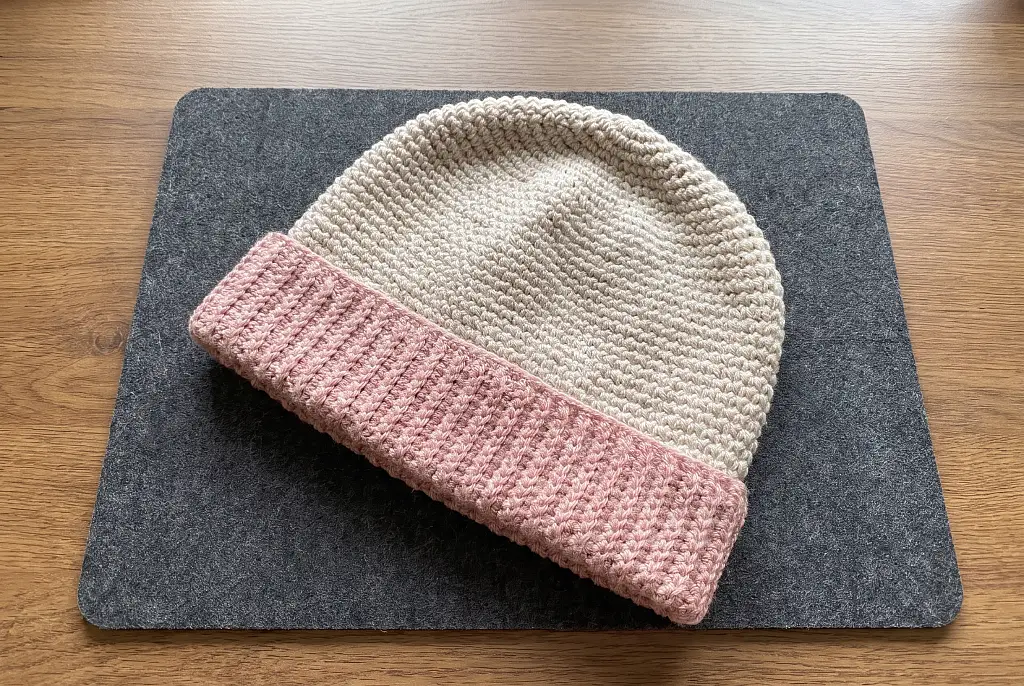 Step 1Attach the ribbed band
Work the beanie from the crown down, then make the ribbed band. Sew the band's first row to its last row to make a ring, then sew that ring onto the last round of the hat, with the band's seam at the back.
 Step 2Make the flower
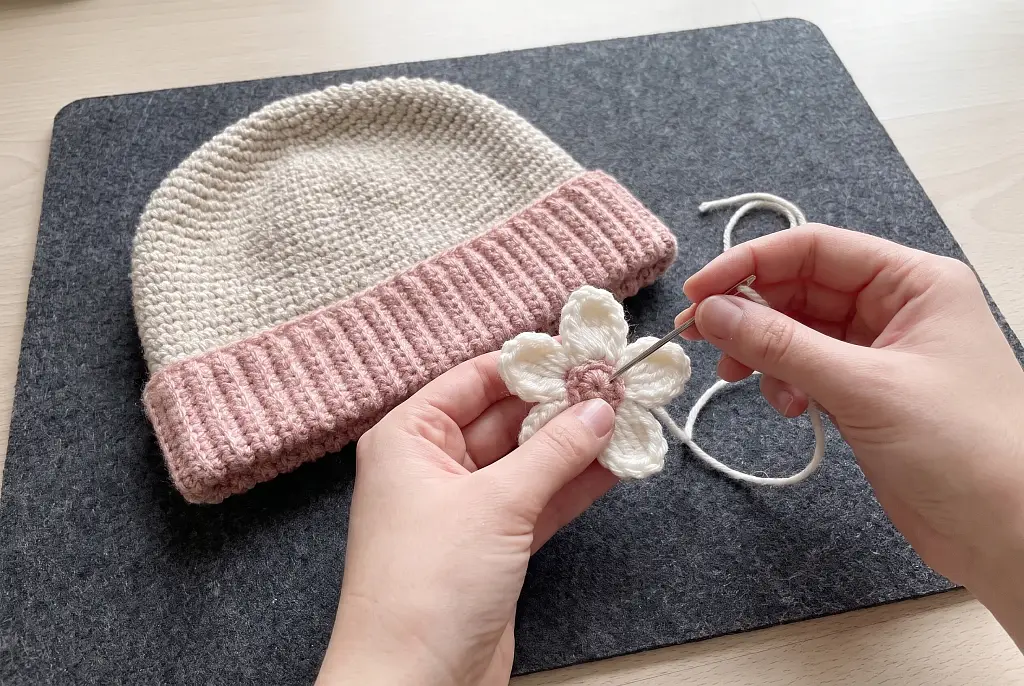
Make the five flat oval petals and lay them in a ring, overlapping slightly at their inner ends. Sew each petal's inner end flat under the edge of the flower center so the petals fan out from under it.
 Step 3Sew flower onto band
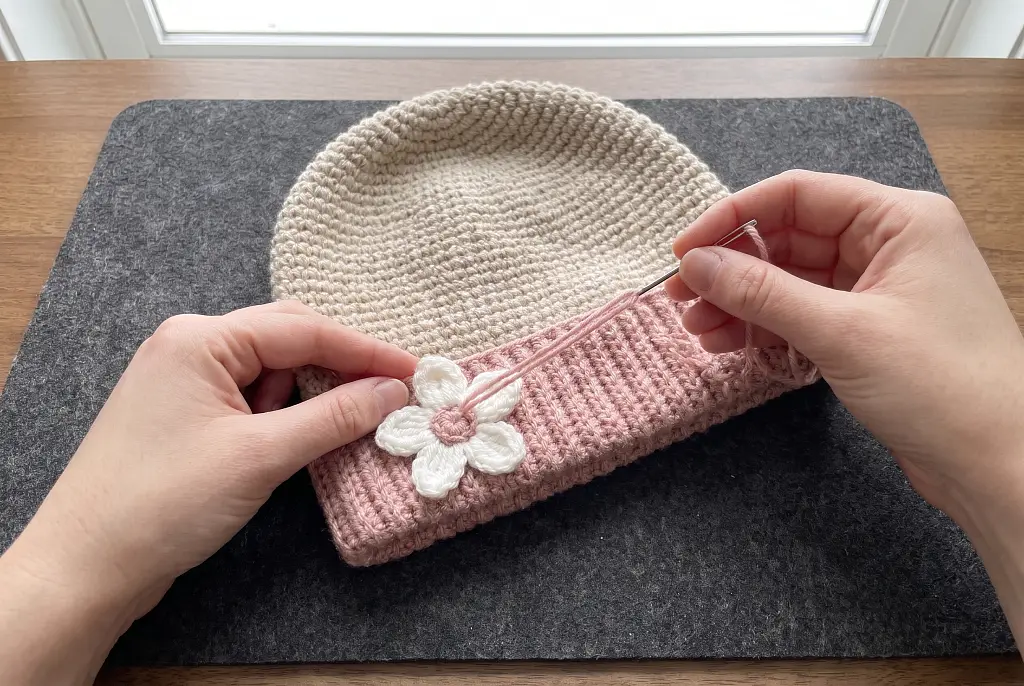
Sew the flower center flat onto the band at one side of the hat, stitching through both the center and the petal ends into the band's ribs so the whole flower lies flat. For Baby and Toddler sizes, leave the flower off and embroider it instead: a blush pink French knot ringed by short milk white straight stitches on the front of the band.
 Step 4Sew on the pom-pom
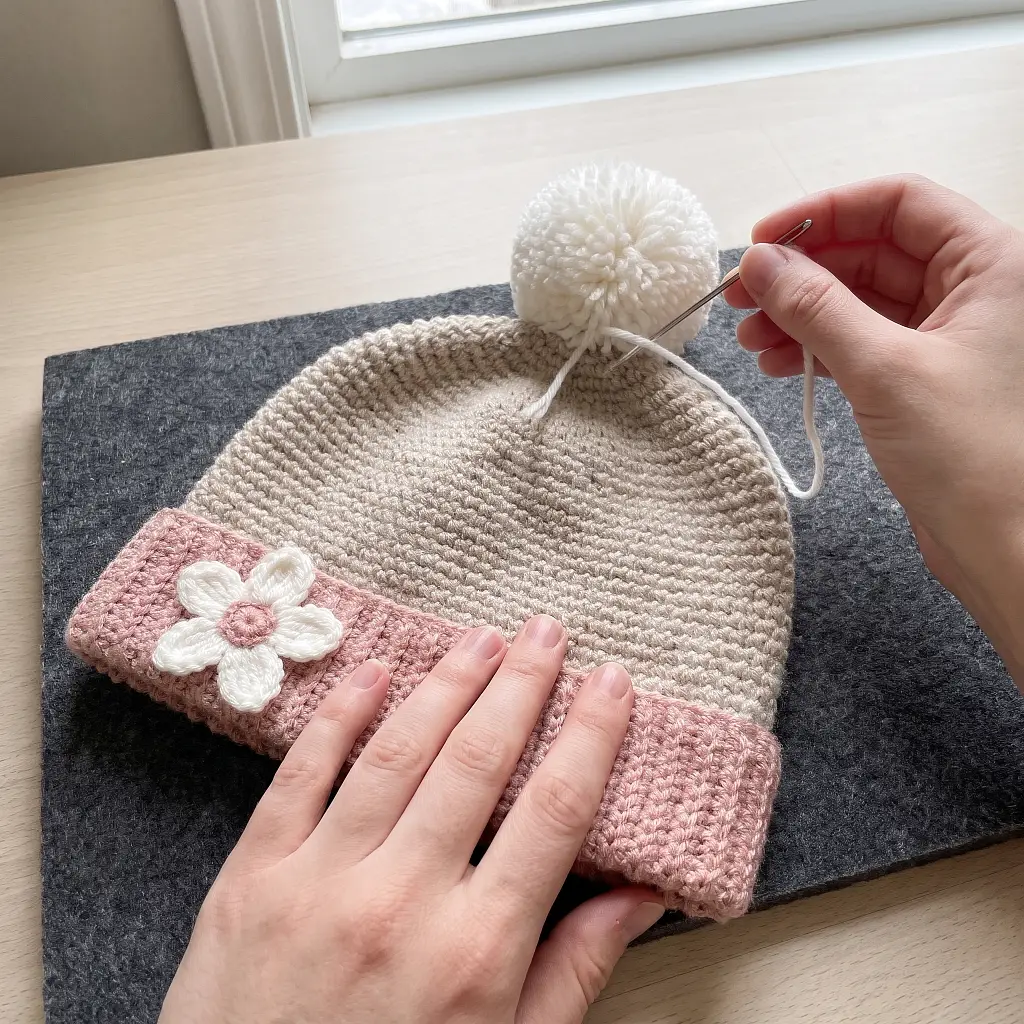
Make a full milk white pom-pom and sew it firmly to the very top of the crown, passing the tails through to the inside and knotting them. Leave the pom-pom off the Baby and Toddler sizes.
- Step 5Weave in the ends
Weave in every end on the inside and trim them close.
Finishing
- Check that the flower lies flat and that every petal end is sewn down, then give the pom-pom a gentle tug to be sure it is secure. (Baby and Toddler sizes: leave the pom-pom off.)
- Weave in all ends on the inside and trim them close.
- To block, lightly steam or mist the hat and shape it over a bowl or your hand, then let it dry flat. Take care not to flatten the ribbing.
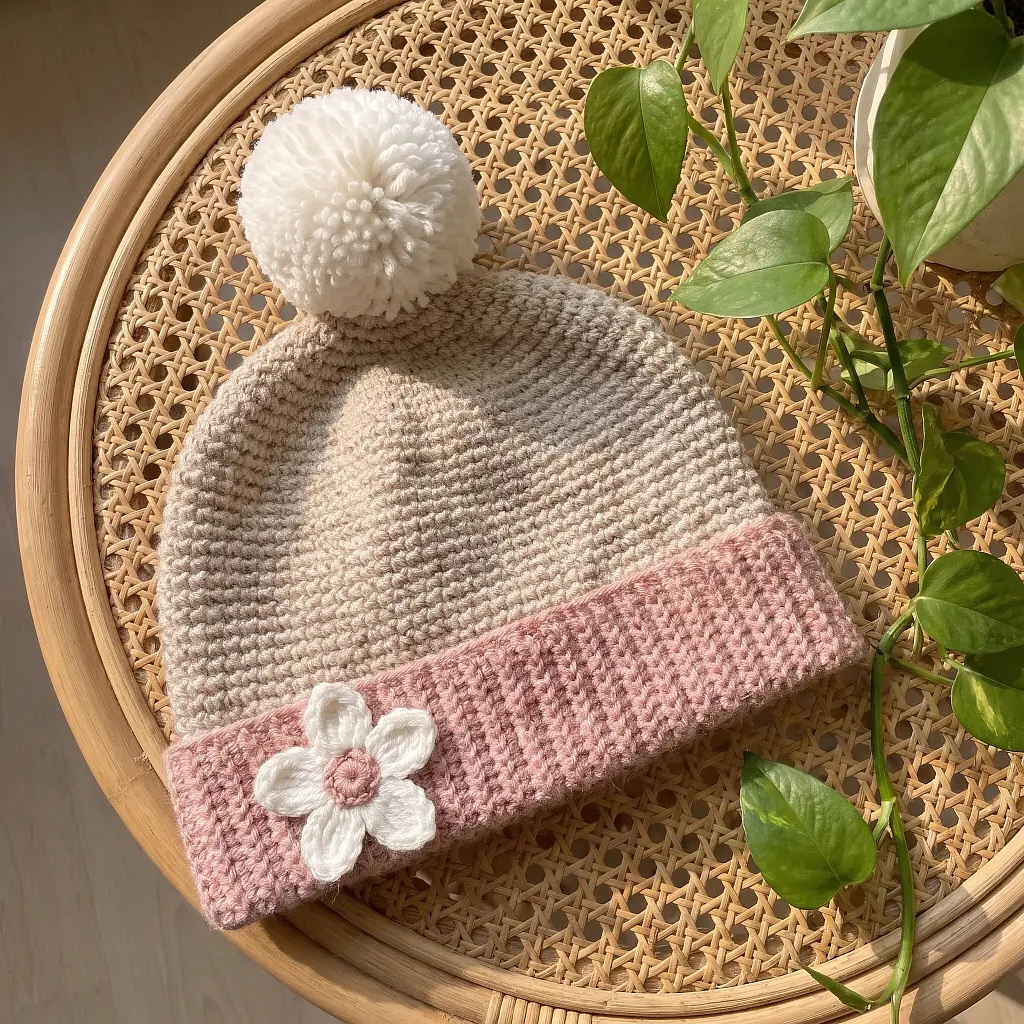
For the Baby and Toddler sizes, leave off the pom-pom: a young child could pull it off and swallow it.
Pattern © HookRow. Free to make, and to sell what you make; please link to this page rather than copying the pattern.
Frequently Asked Questions
How to crochet a beanie that fits?
Measure the head around the forehead, just above the ears, and choose the closest of the pattern's six sizes. This crochet beanie is made a little smaller than the head so it stays on. Swatch first, and if your single crochet runs loose, go down one hook size so the fabric stays firm.
How to crochet a beanie for beginners?
Start with a simple, fitted design like this crochet beanie, which the pattern rates Easy. It uses only single crochet, increases and chains, worked from the top down in a spiral with a stitch marker. The ribbed band is flat rows in the back loop only. Take it slowly, swatch first, and follow the pattern card step by step.
What hook size for a beanie?
This pattern uses a 5.0 mm (US H-8) hook with worsted weight (#4) yarn. That pairing gives the firm fabric a fitted crochet beanie needs. If your stitches come out loose or the crown sags, drop down one hook size. Always check your swatch, because tension varies from one maker to the next.
How to crochet a baby beanie?
Make the Baby size of this crochet beanie, which fits a head of about 16 in. Work the crown firmly, sew the band loosely so it stretches, and choose the embroidered flower, worked as straight stitches around a French knot, instead of the sewn-on one. It's the safer option because nothing can come loose.
Make Your Sandcloud Crochet Beanie
A little care goes a long way with this crochet beanie: a firm gauge, a loosely sewn band and a flower stitched down all the way around. Our clear recommendation is to swatch first and size by the forehead measurement, because those two steps decide almost everything about the fit.
The full pattern is back up the page, with every round, row and assembly step. Choose your size, gather your three colors of worsted weight yarn and make the Sandcloud Fitted Beanie.