Crochet Snowman: Free Worsted Weight Pocket Pattern
Make a pebble-shaped crochet snowman with a flat base and a sewn-on beanie in worsted weight yarn. What makes it sit upright? Round-by-round pattern inside.
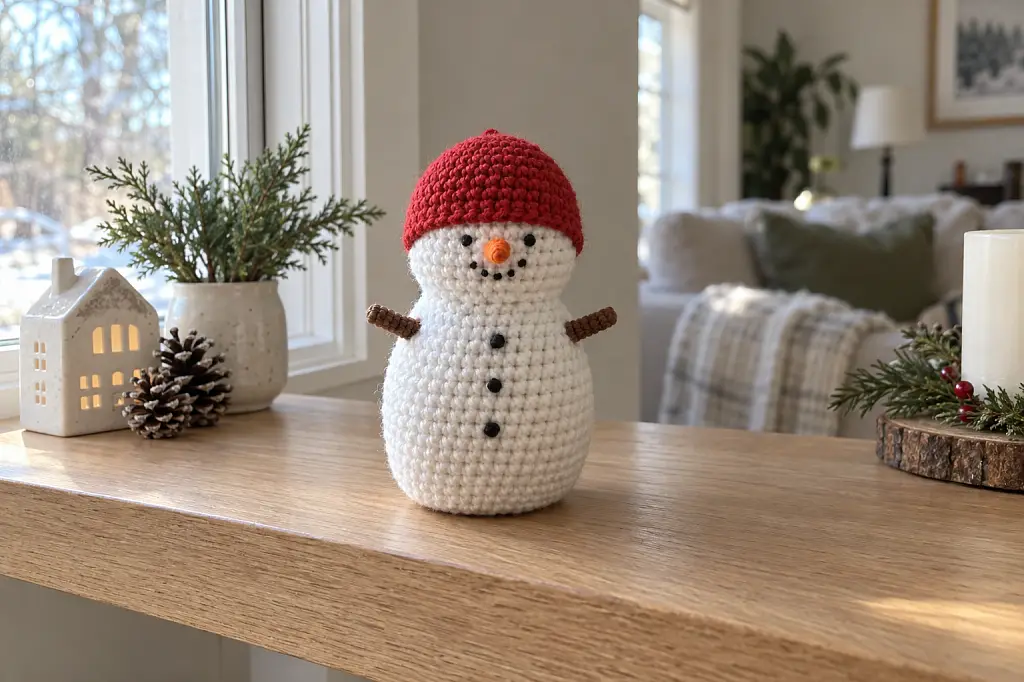
A crochet snowman is a small stuffed figure, usually two or three stacked white spheres worked in single crochet, finished with a scarf, a carrot nose and a hat. It's an easy project that most beginners can finish in an afternoon or two, and it needs only a little white yarn plus scraps.
If you want a crochet snowman you can start tonight, the shapes are forgiving and the stuffing hides small mistakes. We've also written a free pattern of our own, the Snowdrift Pocket Snowman, and it's further down the page. Below you'll find why people make these, how to choose a pattern, and the method behind them.
Why Make a Crochet Snowman?
People make a crochet snowman because it's quick, cheap in yarn, and gets used every winter. It works as a tree ornament, a shelf decoration, a gift topper or a small toy, and it's a good first amigurumi because the parts are plain spheres.
There are a few variations worth knowing. A classic stacked snowman has a round head and one or two body layers. A pebble-shaped one, wider at the base, sits flat without help. Mini versions in thin cotton make ornaments, while super bulky chenille gives a soft, cuddly figure with almost no effort.
Size follows the yarn. The free patterns we looked at give finished heights from about 4 inches in sport weight cotton to about 9 inches in super bulky chenille, with worsted versions around 8 inches. Time follows size too, so a mini can be an evening and a large one a weekend.
It also suits a mixed group of makers. Beginners get practice with the magic ring, increases and stuffing, while experienced makers can use a snowman to try embroidered faces, textured scarves or small accessories. It's a good project for using up odd bits of red, black and orange yarn.
How Do You Choose a Crochet Snowman Pattern?
Check the yarn weight, the finished size, the skill level and the terms before you start. Then look for clear photos of the finished piece, because a snowman's charm lives in its proportions, and a picture tells you more than a description.
Start with yarn. Patterns call for anything from sport cotton to chenille, and the hook changes with it. DIY Fluffies offers a free snowman pattern with two versions, a mini in sport weight cotton on a 2.5 mm (B/1) hook and a larger one in super bulky chenille on a 5 mm (H/8) hook. Cutiepie Crochet's free snowman amigurumi uses worsted weight and a 3.75 mm hook, and Yarn + Chai's free amigurumi snowmen use medium chenille on a 4 mm hook in a 2-layer or 3-layer build.
Next, check the terms. Many amigurumi patterns are written in US terms, with sc for single crochet, inc for increase and dec for decrease, but UK terms differ, so confirm which one the designer uses. Also notice what each pattern asks for in the finish, since the sources don't agree on everything.
- Scarf stitch: half double crochet in the first two patterns, crossed single crochet in the third.
- Eyes: plastic safety eyes, small buttons, or embroidery.
- Layers: one stacked body, or a two- or three-layer build.
- Skill level: all three call themselves easy.
Finally, look at how much stuffing and sewing the pattern expects. If you'd rather not sew a lot, pick a one-piece body.
How Is a Crochet Snowman Made?
You work each part in the round in single crochet, stuff it as you close, then sew the pieces together and add the face and accessories. This article uses US terms throughout: ch is chain, sl st is slip stitch, sc is single crochet, hdc is half double crochet, inc is increase and dec is decrease.
Yarn, hook and gauge
Choose a hook one size smaller than the yarn label suggests. A tight fabric stops white stuffing showing through the stitches, which is the most common flaw in snowmen. Gauge doesn't matter for fit, but it decides the finished height, so a loose fabric gives a bigger, floppier figure.
Construction order
- Make a slip knot, then a magic ring or a short chain, and work the first round in sc.
- Increase evenly until the sphere is as wide as you want, work even rounds, then decrease.
- Stuff firmly before the opening gets too small, then fasten off and close.
- Make the second layer, or the head, the same way, and join the pieces with a yarn needle.
- Add the scarf, hat and nose, then place the eyes before you stitch them down.
Our own Snowdrift Pocket Snowman builds the body as one piece in worsted (#4) yarn on a 4.0 mm (US G-6) hook, so check the pattern card for the exact rounds.
Which Yarn and Hook Give Which Size?
The yarn weight and hook size set the finished height, and the sources give different figures because each uses a different yarn. The table shows what the three free patterns state, and it's a good way to match a snowman to the yarn already in your stash.
| Source | Yarn | Hook | Finished height |
|---|---|---|---|
| DIY Fluffies (mini) | Sport weight cotton | 2.5 mm (B/1) | about 9 cm / 4 in |
| DIY Fluffies (large) | Super bulky chenille | 5 mm (H/8) | 22 cm / 9 in |
| Cutiepie Crochet | Worsted weight | 3.75 mm | about 8 in |
| Yarn + Chai | #4 chenille, DK orange nose | 4 mm | 2-layer 4.75 in, 3-layer 8 in |
Yarn amounts vary too. Yarn + Chai lists about 80 yards of body yarn for the 2-layer snowman and 130 yards for the 3-layer one, while DIY Fluffies lists about 15 g of white for the mini. Treat these as a guide for your own stash.
For your own project, the same rule applies. Our free Snowdrift Pocket Snowman is estimated at about 4.8 inches tall and 3.3 inches across, using roughly 46 to 65 yards in all, so a worsted snowman near that size is a sensible first try.
Common Mistakes and How to Fix Them
Most problems with a crochet snowman come from loose stitches, uneven stuffing or a rushed face. Each has a clear cause and a simple fix, so you can correct them before the piece is sewn together.
- Stuffing shows through the stitches. The hook is too large for the yarn. Drop one hook size, or work a tighter stitch, and the fabric closes up.
- The body leans or won't sit. The base is too soft or too rounded. Stuff the bottom layer more firmly, and keep the base wider than the top.
- Layers twist when joined. The pieces weren't lined up before sewing. Pin them first, and sew around the whole join with the stitches facing the same way.
- The face looks off. Eyes were set too far apart or too low. Pin the eyes in place and check from a distance before you attach safety eyes, since they can't be moved afterward.
- Chenille sheds or pills. Chenille has a fragile core, so keep the hook movement gentle and avoid pulling out many rows.
There's one more detail that generic advice skips. Safety eyes are set between two rounds of the head, and the sources place them before closing the stuffing, which is why planning their position matters. Cutiepie Crochet and DIY Fluffies use safety eyes, while Yarn + Chai also suggests embroidered eyes, brows and a mouth, planned with a temporary marker.
If you're making a gift for a small child, embroidered features are the safer choice, since nothing can come loose. For another small stuffed gift in the same spirit, see these free crochet baby booties patterns.
Snowdrift Pocket Snowman
A one-piece pebble-shaped snowman with a weighted flat base and a little sewn-on beanie instead of a top hat.
- SkillEasy
- YarnWorsted (#4)
- Hook4.0 mm (US G-6)
- SizeAbout 4.8 in tall and 3.3 in across*
- YardageAbout 46 to 65 yd in all*
- TimeAbout 2.5 to 4.5 hours*
Materials
- Worsted weight yarn: white about 35–50 yd, red about 6–8 yd, brown about 4–5 yd, orange about 1–2 yd
- 4.0 mm (US G-6) crochet hook
- Black yarn or embroidery floss for the face and buttons
- Polyester fiberfill
- A flat cardboard or plastic disc about 2.2 in across (for the base)
- A sealed pouch of poly pellets, about two tablespoons (for the base)
- Stitch markers
- Yarn needle
- Scissors
- Optional, for a decor piece only: 6 mm safety eyes
Before you start
- Work at a tight gauge so the stuffing does not show through the white. If your single crochet is loose, go down to a 3.5 mm hook.
- Use a stitch marker to keep track of the start of each round, and move it up as you go.
- Try the beanie on the head and check the brim height before sewing. A round higher or lower changes the whole face.
- For a baby or a child under three, skip the pellet pouch and the disc and stuff the base with fiberfill only. Sew the embroidered face down with short, firm stitches.
- Safety eyes (6 mm) may replace the embroidered eyes for a decor piece only. They must go in during step 2, before the head is stuffed and closed.
Abbreviations
US terms: ch = chain · sl st = slip stitch · sc = single crochet · inc = 2 sc in the same st · dec = sc 2 together · st = stitch · Rnd = round
The number at the end of each round is its stitch count. Use a stitch marker to find the start of each round.
Part 1 · Snowman body (white)
The body is worked in one piece from the flat base up to the closed top, and stuffed as you go.
- Rnd 1Magic ring, 6 sc in the ring.6
- Rnd 2Inc in each st around.12
- Rnd 3(Sc 1, inc) × 6.18
- Rnd 4(Sc 2, inc) × 6.24
- Rnd 5Sc 1, inc, (sc 3, inc) × 5, sc 2.30
- Rnd 6(Sc 4, inc) × 6.36
- Rnd 7Sc 5, inc, (sc 11, inc) × 2, sc 6.39
- Rnd 8(Sc 12, inc) × 3.42
- Rnd 9Sc 3, inc, (sc 6, inc) × 5, sc 3.48
- Rnds 10–13Sc in each st around.48
- Rnd 14(Sc 14, dec) × 3.45
- Rnd 15Sc in each st around.45
- Rnd 16Sc 6, dec, (sc 13, dec) × 2, sc 7.42
- Rnd 17(Sc 12, dec) × 3.39
- Rnd 18Sc 5, dec, (sc 11, dec) × 2, sc 6.36
- Rnd 19(Sc 4, dec) × 6.30
- Rnd 20Sc 4, dec, (sc 8, dec) × 2, sc 4.27
- Rnd 21(Sc 7, dec) × 3.24
- Rnd 22Sc in each st around.24
- Rnd 23Sc 3, inc, (sc 7, inc) × 2, sc 4.27
- Rnd 24Sc in each st around.27
- Rnd 25(Sc 8, inc) × 3.30
- Rnds 26–27Sc in each st around.30
- Rnd 28Sc 4, dec, (sc 8, dec) × 2, sc 4.27
- Rnd 29(Sc 7, dec) × 3.24
- Rnd 30Sc 3, dec, (sc 6, dec) × 2, sc 3.21
- Rnd 31(Sc 5, dec) × 3.18
- Rnd 32(Sc 1, dec) × 6.12
- Rnd 33Dec × 6.6
Finish stuffing before Rnd 32. Fasten off, weave the tail through the last stitches and pull them closed.
Part 2 · Pull-on beanie (red)
The beanie starts from a chain ring and is worked in the round. It is left hollow.
- Rnd 1Ch 30; join with a sl st in the first ch to form a ring, without twisting it. Sc in each ch around.30
- Rnd 2(Sc 8, dec) × 3.27
- Rnd 3Sc 3, dec, (sc 7, dec) × 2, sc 4.24
- Rnd 4(Sc 6, dec) × 3.21
- Rnd 5Sc 2, dec, (sc 5, dec) × 2, sc 3.18
- Rnd 6(Sc 1, dec) × 6.12
- Rnd 7Dec × 6.6
Leave it unstuffed. Fasten off, weave the tail through the last stitches and pull them closed.
Part 3 · Stick arm (brown, make 2)
Make two. Each arm is worked in the round and left hollow, with the open end kept for sewing.
- Rnd 1Magic ring, 6 sc in the ring.6
- Rnds 2–6Sc in each st around.6
Fasten off, leaving a long tail for sewing.
Part 4 · Carrot nose (orange)
A tiny carrot, worked in the round and left hollow, with the open end kept for sewing.
- Rnd 1Magic ring, 6 sc in the ring.6
- Rnds 2–3Sc in each st around.6
Fasten off, leaving a long tail for sewing.
Assembly, step by step
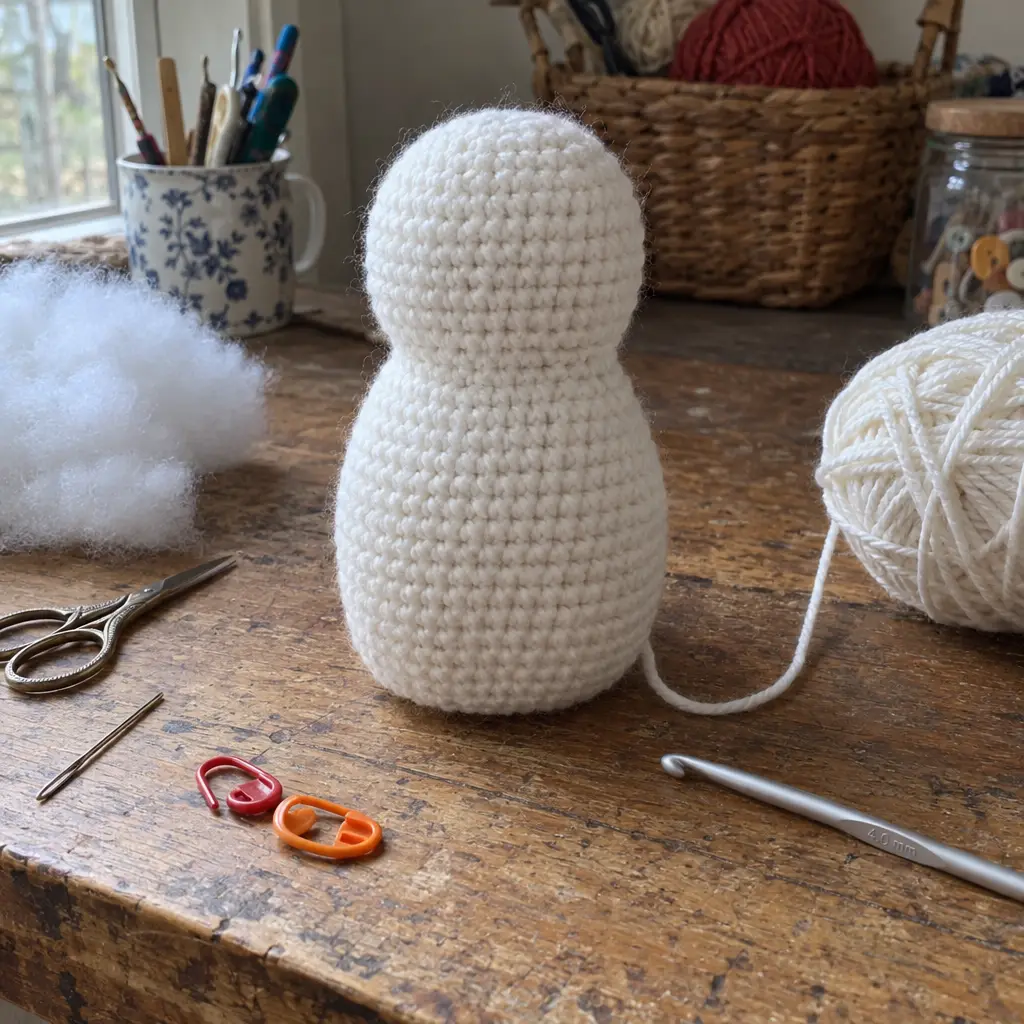 Step 1Work the weighted body
Work the body from the magic ring at the flat base up toward the closed top. When the flat base and the first belly rounds are done, drop in the flat disc so it lies directly against the inside of the crocheted base, then set the sealed pellet pouch on top of the disc. Press the base flat against the table and stuff the belly firmly as you go, keeping the waist pinch soft so it stays defined.
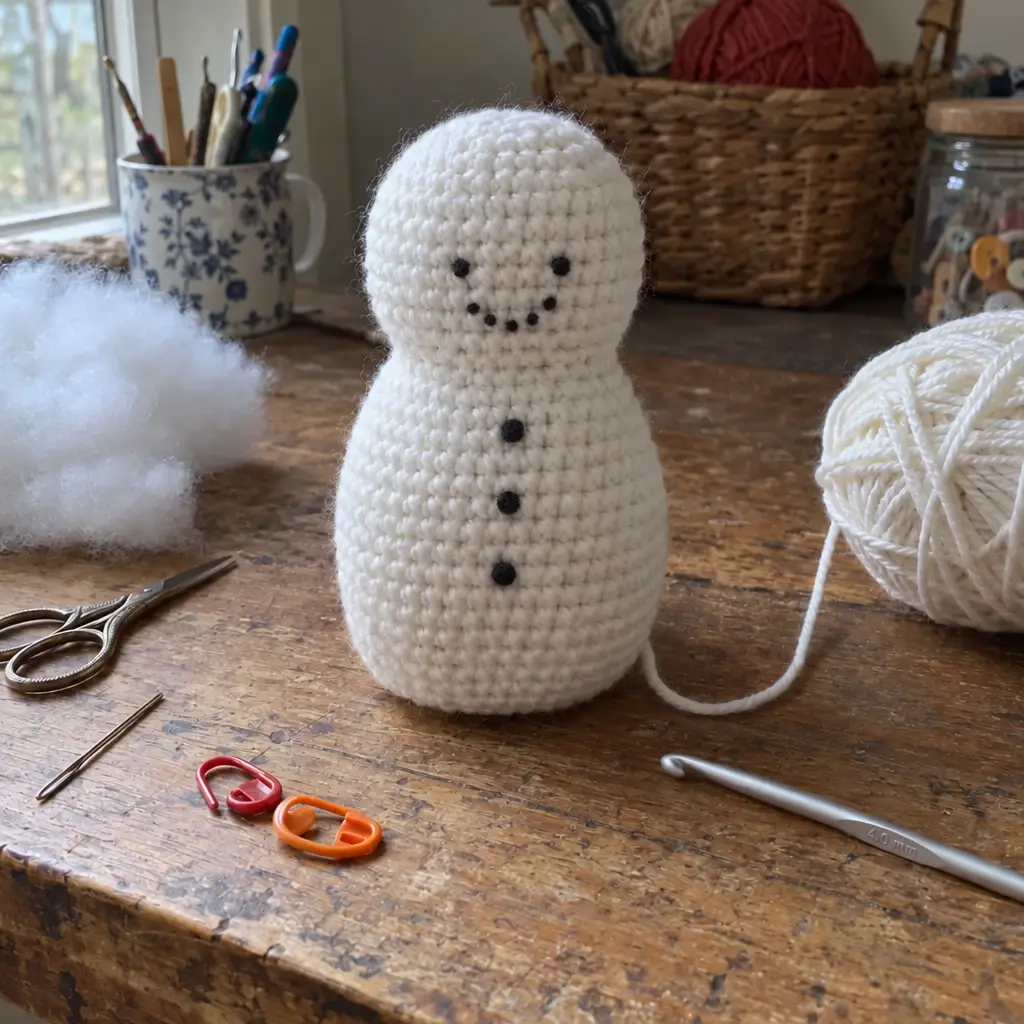 Step 2Embroider the face and buttons
Before the last decrease rounds close the head, embroider the face in black: two eyes about 0.5 in apart, above the waist pinch, and a curved smile of five small stitches below them. Add three French knot buttons down the center front of the belly, evenly spaced below the waist pinch. Finish stuffing the head firmly, then close the top and weave in the tail.
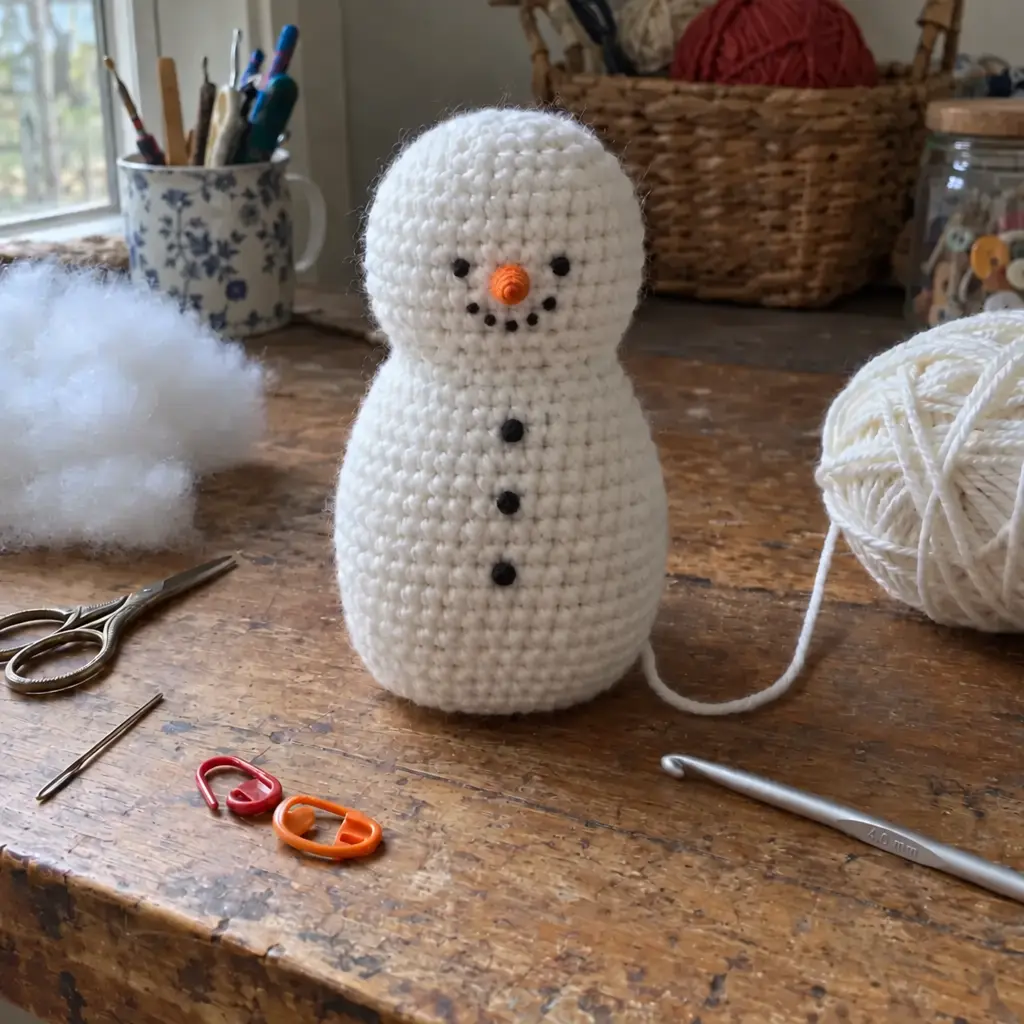 Step 3Sew on the nose
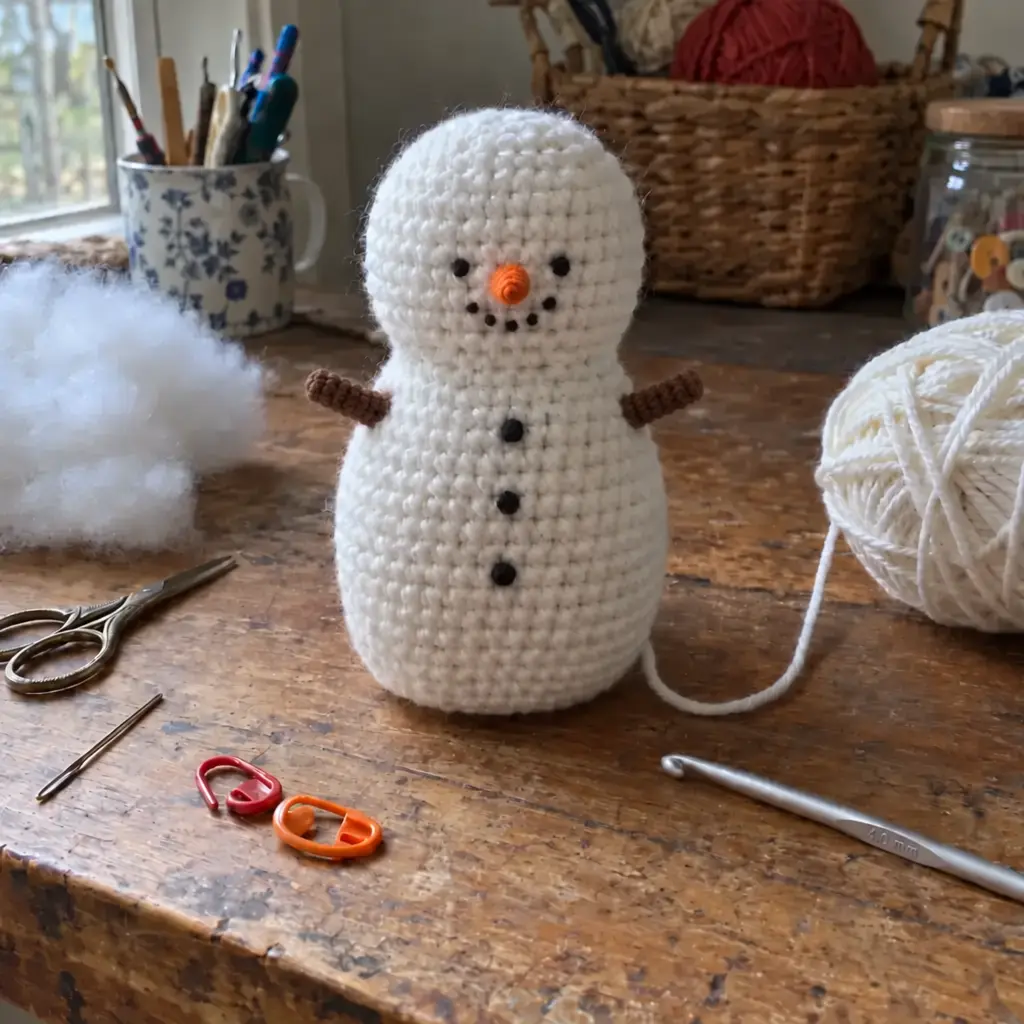
Sew the nose to the head by its open end, point outward and angled slightly up, centered between the eyes and just above the smile.
 Step 4Sew on the arms
Sew each arm to the body by its open end, one on each side at the upper belly just below the waist pinch, with the tips angled out and slightly up. Leave the arms unstuffed and flat.
 Step 5Sew on beanie and loop
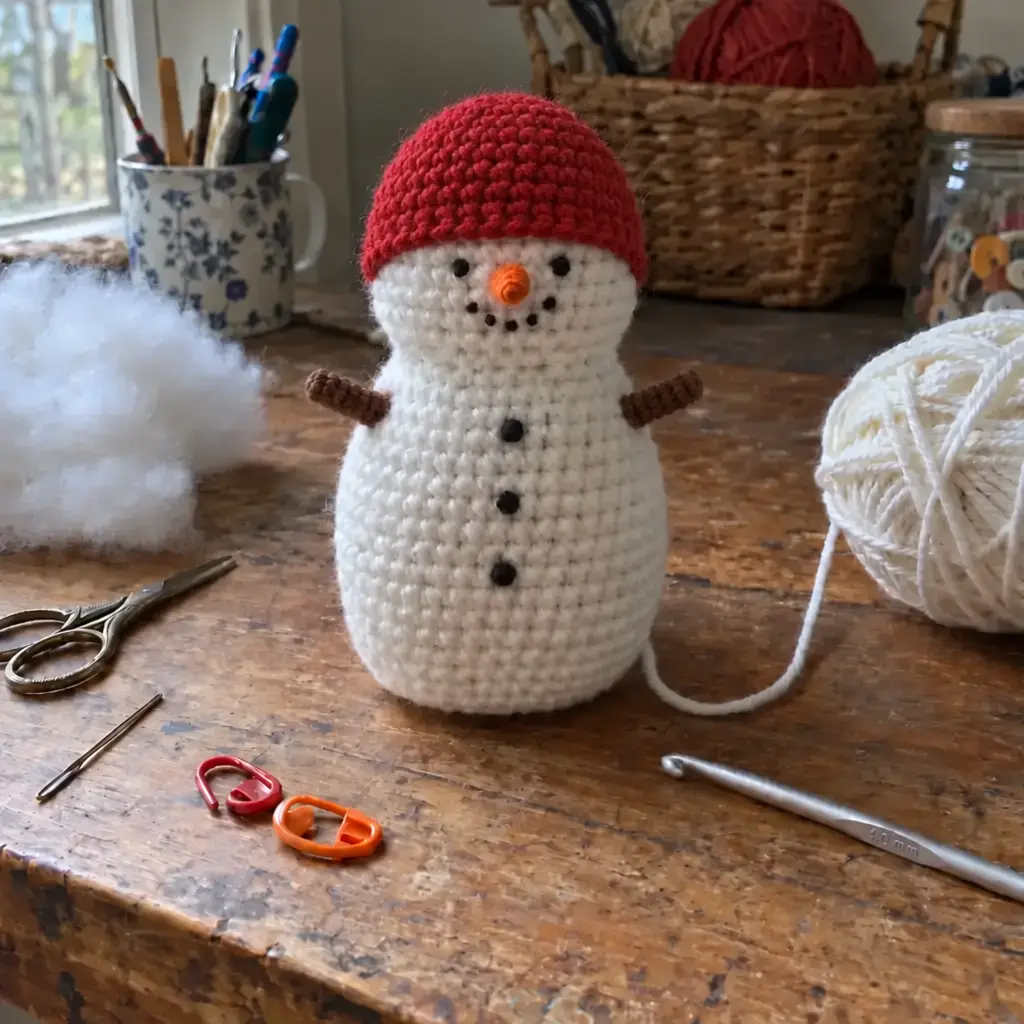
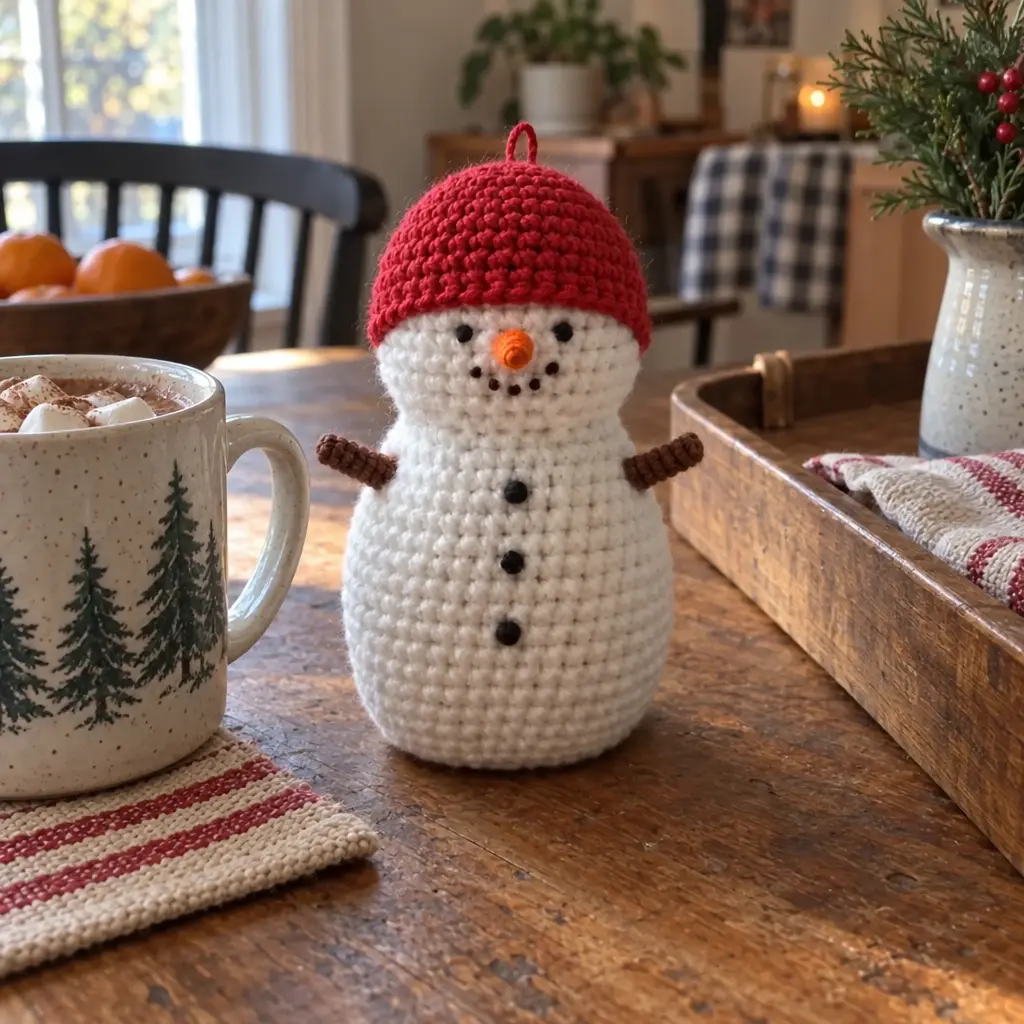
Set the beanie on the head, crown up and open brim edge down, so the brim sits just above the eyes. Pin it, ease the brim evenly around the head, and sew the whole brim edge down. Then chain about 3 in in red for the hanging loop and sew it to the closed crown.
- Step 6Squeeze and stand up
Give the belly a last squeeze to round it out, and stand the snowman on his flat base.
Finishing
- Weave in all remaining ends, tucking them into the stuffed body or inside the beanie.
- Check that the nose, arms and hat are sewn on firmly, and that the beanie brim is even all the way around.
- Gently reshape the belly and the waist pinch with your hands so he sits upright.
The pellet pouch and disc are for decor pieces only. For a baby or a child under three, leave them out and stuff the base with fiberfill only, and sew the embroidered face down with short, firm stitches. Do not use safety eyes on anything meant for a young child.
Pattern © HookRow. Free to make, and to sell what you make; please link to this page rather than copying the pattern.
Frequently Asked Questions
How to crochet a snowman free pattern?
Pick a free pattern, gather white yarn plus red, black and orange scraps, and work the body in single crochet rounds. Stuff it, sew the pieces together, then add the scarf, nose and face. Our own Snowdrift Pocket Snowman, further up the page, is a free pattern, and DIY Fluffies, Cutiepie Crochet and Yarn + Chai also offer free ones.
What yarn and hook size should I use to crochet a snowman?
Worsted weight yarn with a hook around 3.75 mm to 4 mm is a common, easy choice. The free patterns we reviewed also use sport cotton on 2.5 mm and super bulky chenille on 5 mm. Pick a hook slightly small for the yarn, so the stitches stay tight and the stuffing doesn't show through.
How long does it take to crochet a snowman?
A small crochet snowman typically takes a few hours, and a larger, multi-layer one can take a weekend. Our Snowdrift Pocket Snowman is estimated at about 2.5 to 4.5 hours, though it hasn't been test-made. Your time depends on yarn weight, stitch speed, and how much sewing and face detail you add.
Is a crochet snowman easy enough for beginners?
Yes, a crochet snowman suits beginners, and all three free patterns we reviewed rate themselves easy. You mostly work single crochet in the round, with simple increases and decreases. The parts are plain spheres, stuffing hides small errors, and you can embroider the face if you'd rather skip safety eyes.
Make Your Own This Winter
For the cold months, a crochet snowman is one of the friendliest small projects around, and you probably own the yarn already. Our recommendation is simple: use worsted yarn, go down a hook size, and stuff firmly. The free Snowdrift Pocket Snowman pattern is above on this page, with every part and assembly step laid out. Gather your white, red, brown and orange yarn, make a slip knot, and start the body this week. For more projects to try next, browse our free crochet patterns.